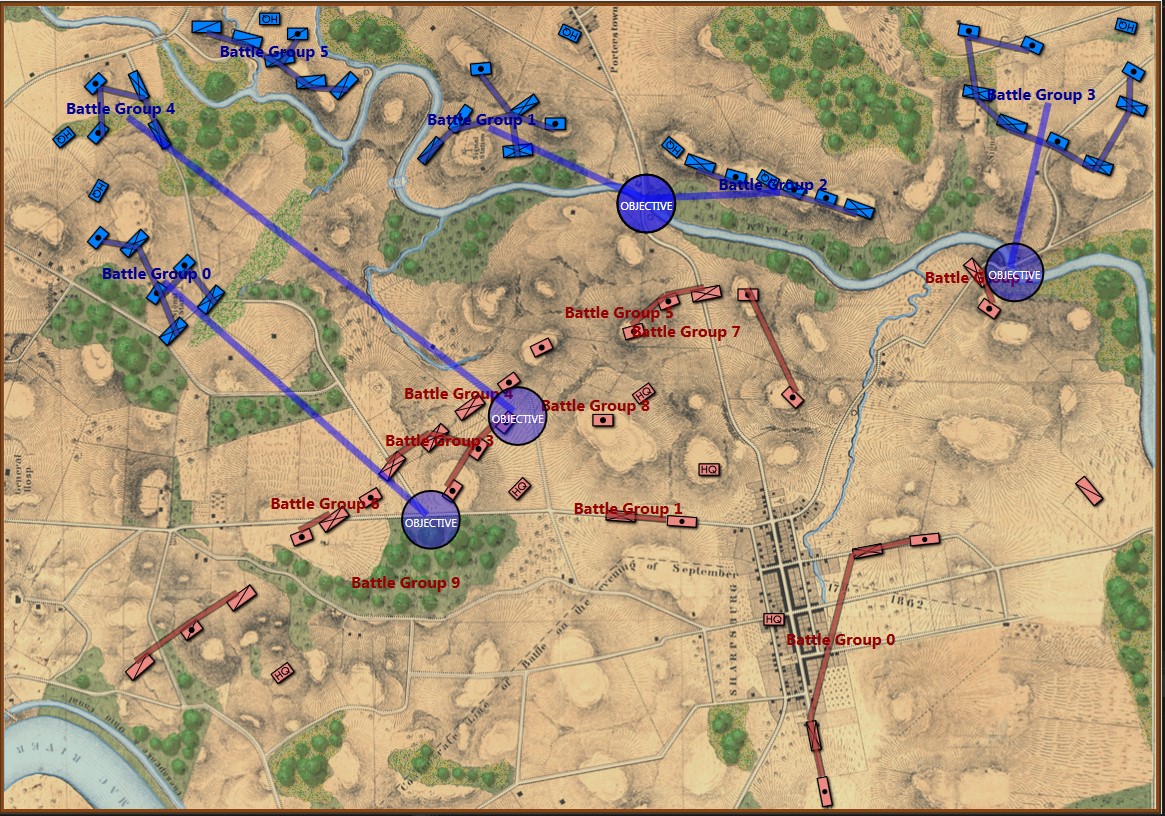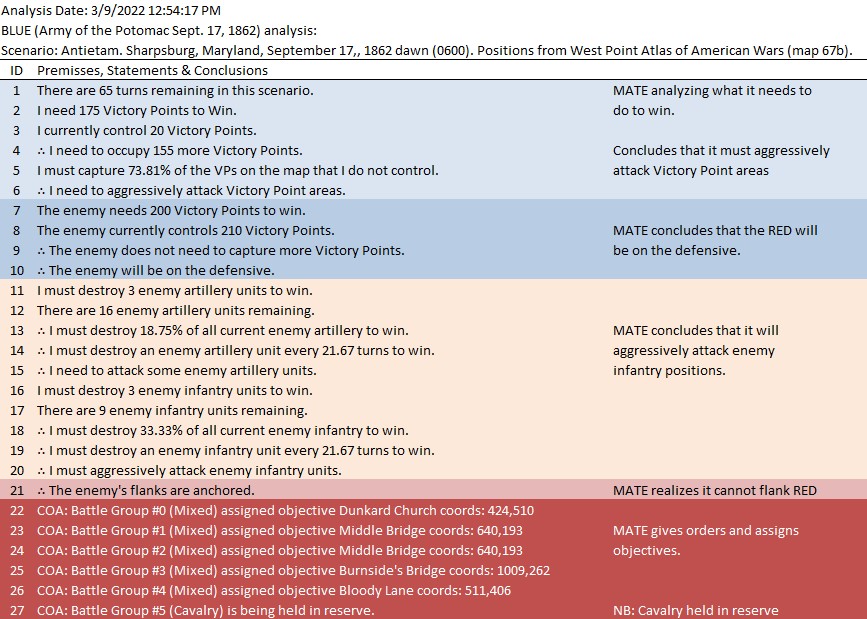
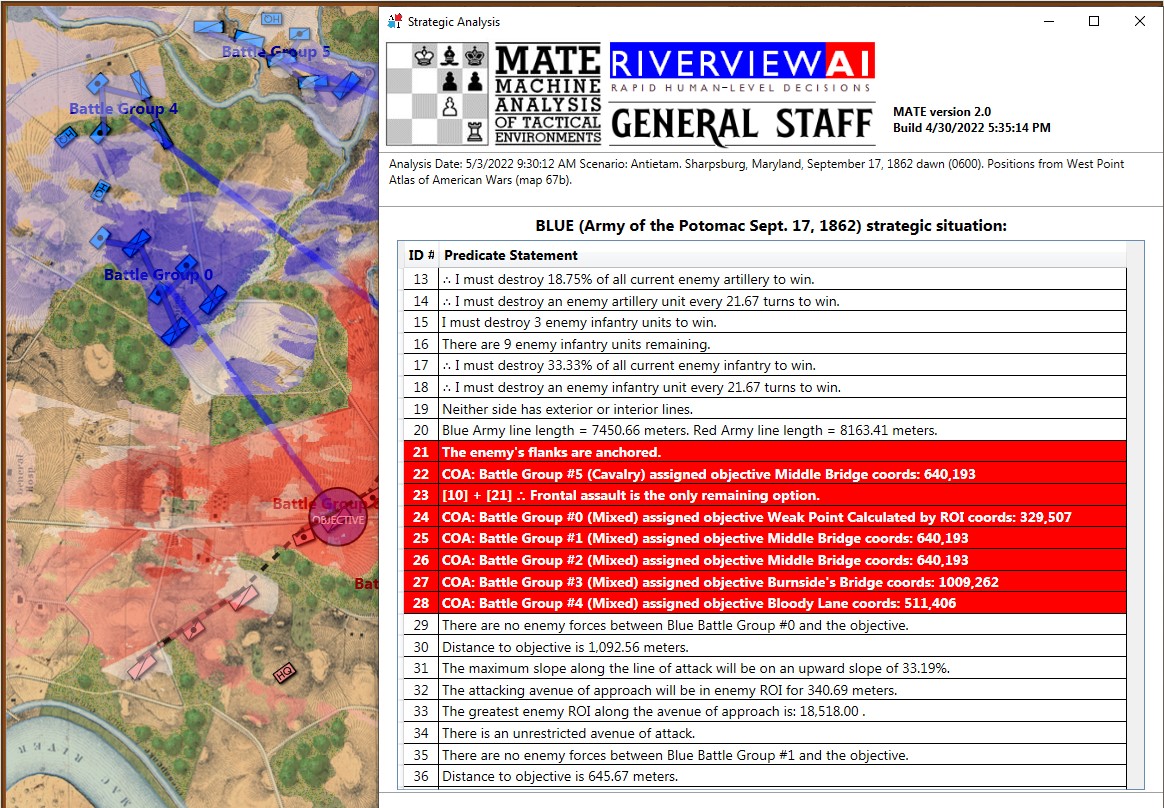
MATE’s analysis of Blue (Union) position at Antietam. NB: Unable to outflank Red’s position, MATE has calculated the Schwerpunkt, or optimal point of attack on Red’s lines. Click to enlarge.
The holy grail of military science is an algorithm that calculates the optimal point of attack upon an enemy’s lines. In German, the word is Schwerpunkt and is commonly translated as
MATE (Machine Analysis of Tactical Environments 2.0, the AI behind General Staff: Black Powder) is now able to calculate Schwerpunkt to a new, substantially greater, degree of accuracy. There are a number of reasons why this is now possible, but the primary cause must be the ability to analyze the battlefield in 3D and to accurately map where every unit on the map can project its force. Indeed, for many years now I have looked at the problem of computational military reasoning (AI for tactical situations) as a force projection problem.
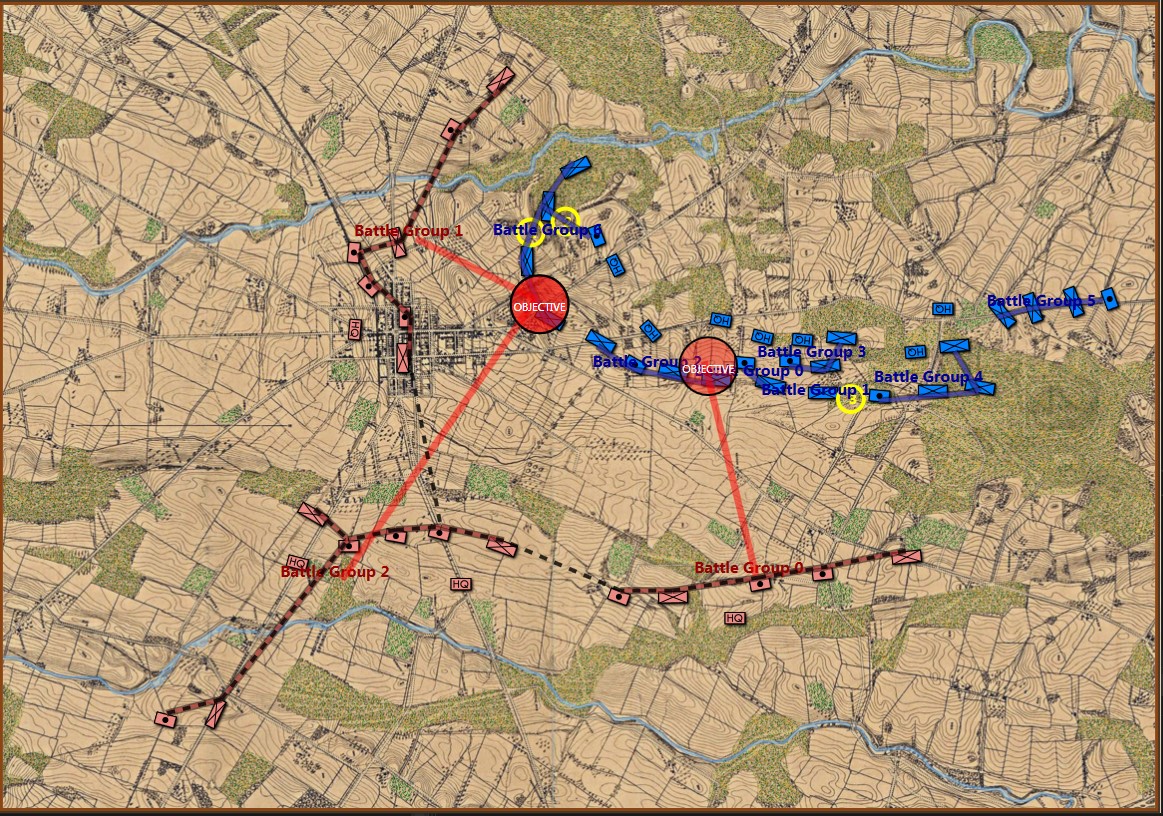
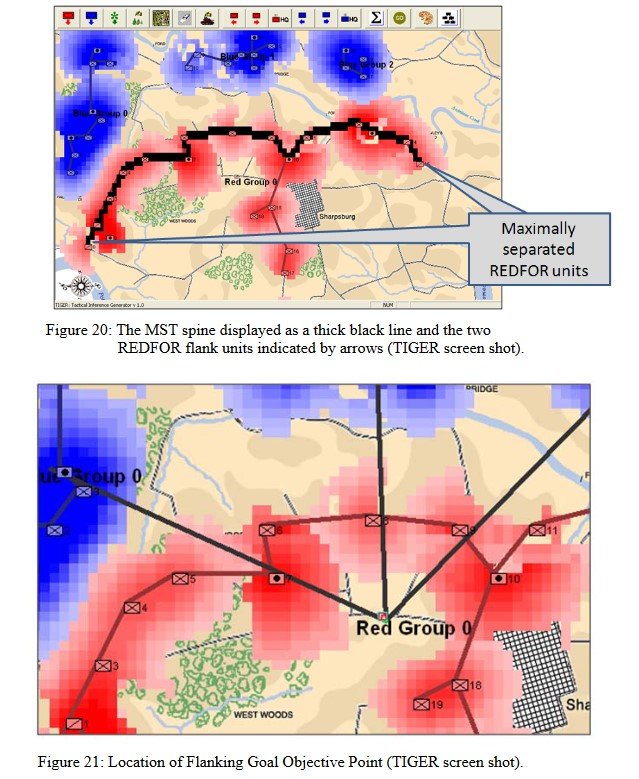
Below, is a visual representation of the total force projection of all units at Gettysburg, Day 3 (July 3, 1863 0600 hours):
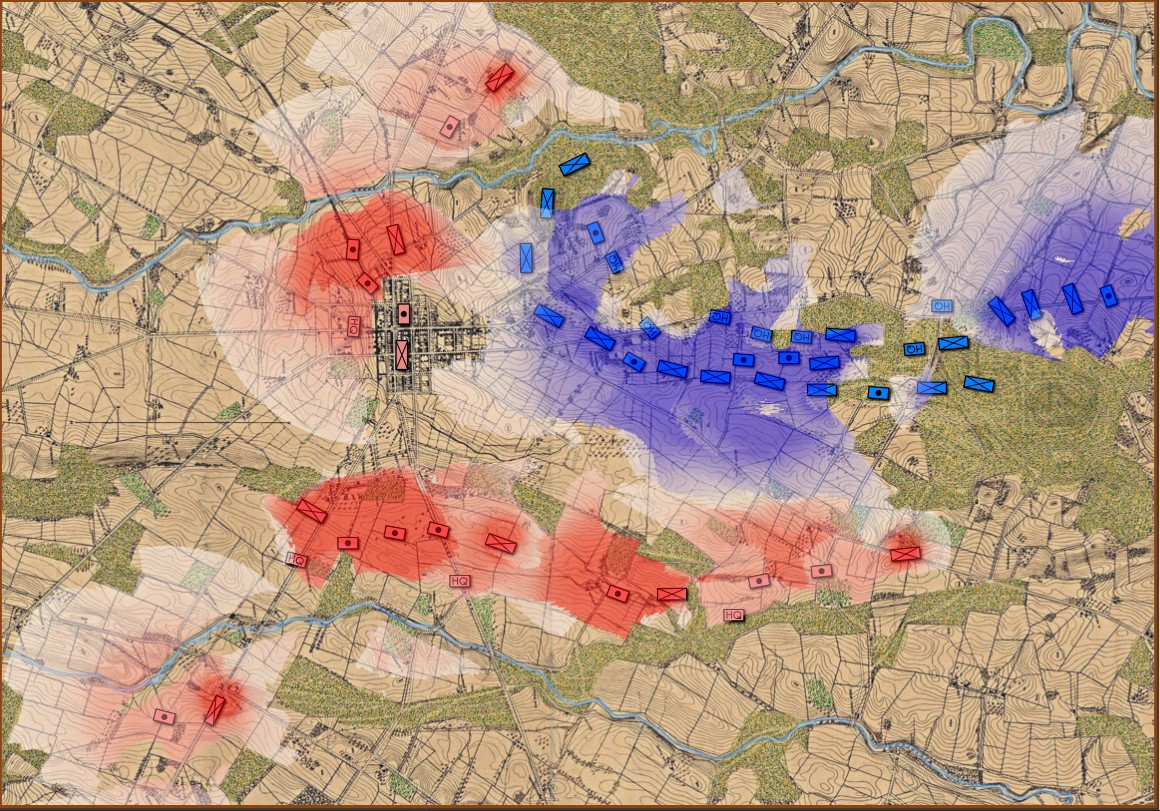
Visual representation of the total force projection (Range of Influence, or ROI) for all units at Gettysburg Day 3. Note: normalization and alpha values affect color output. Also, note how the terrain (woods, depressions, hills) shape the projection of force. Also, all projections are independent of unit facing. Click to enlarge.
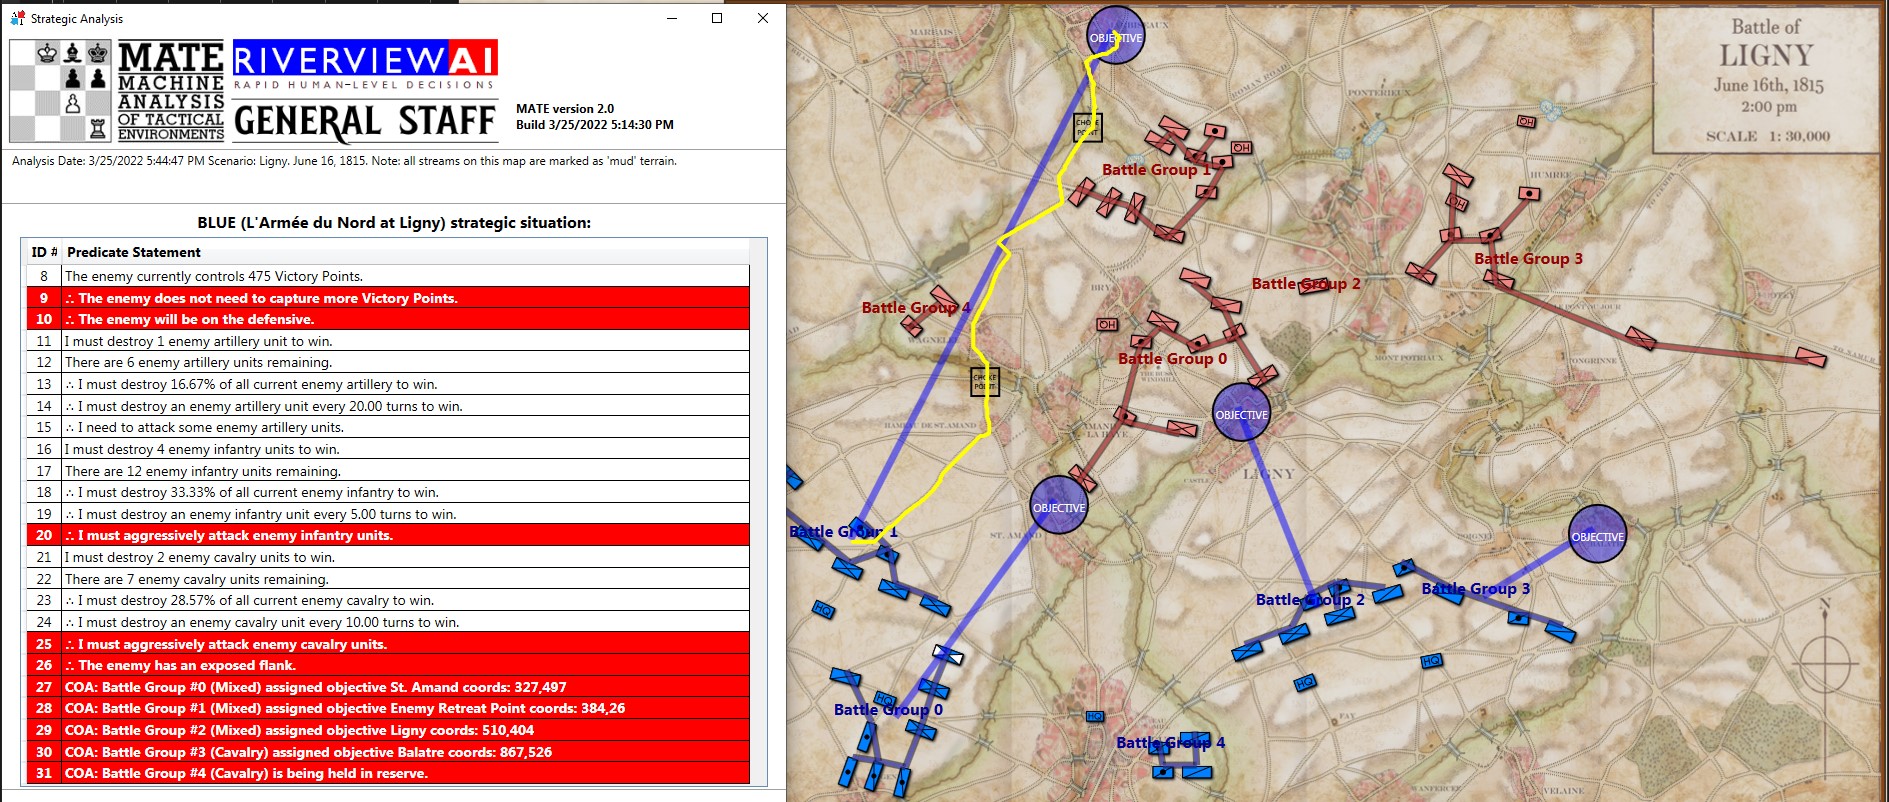
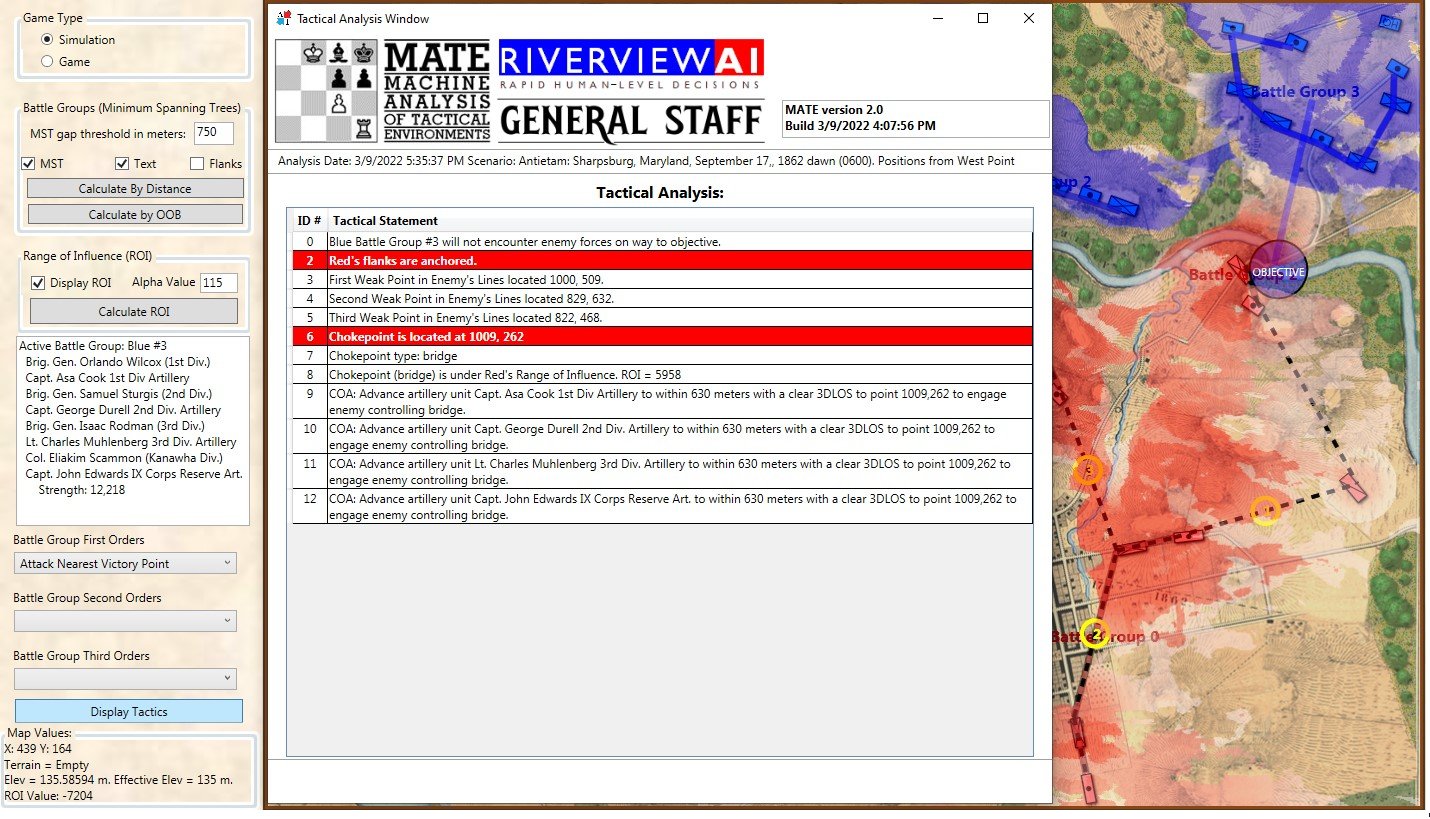
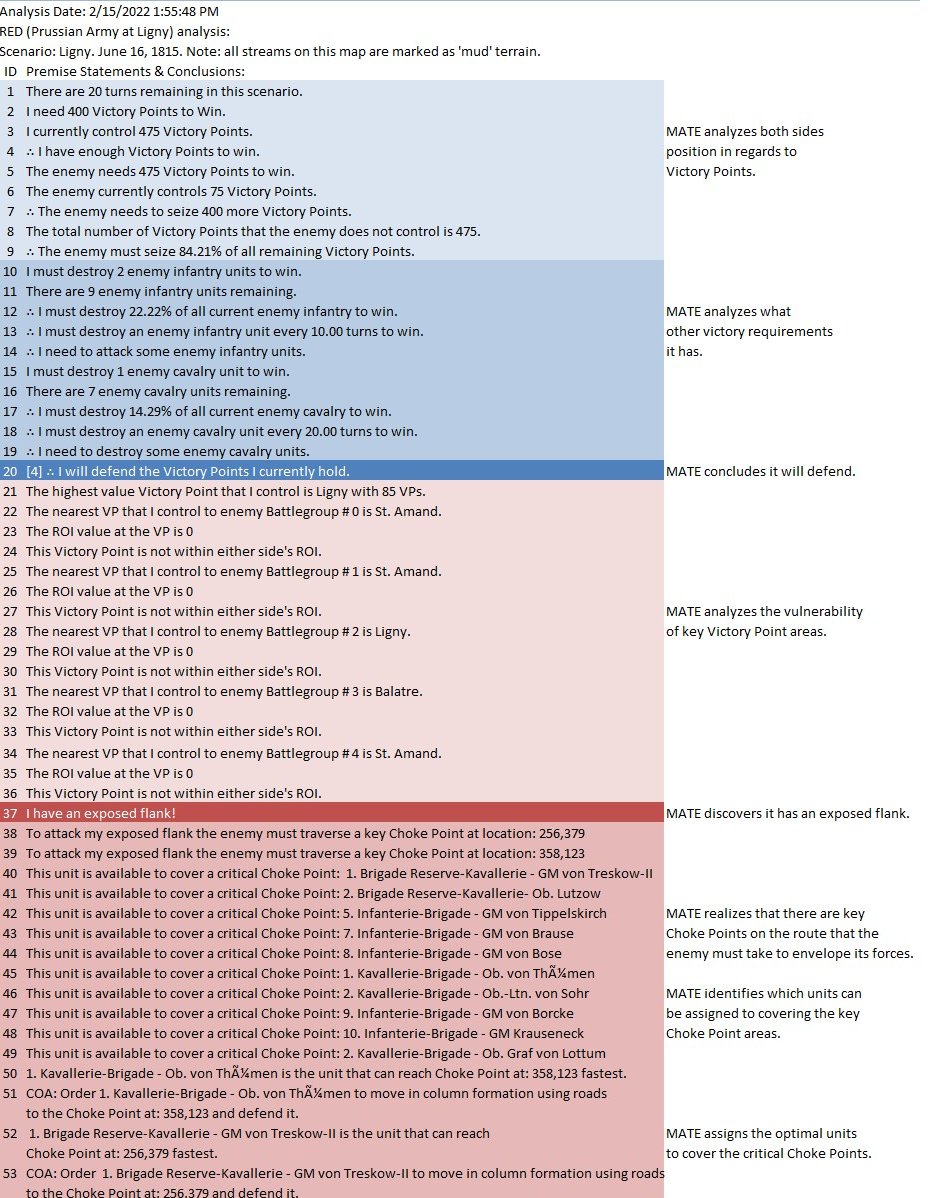
If we ask MATE to determine the Schwerpunkt for the Confederates in the above situation, it responds with:
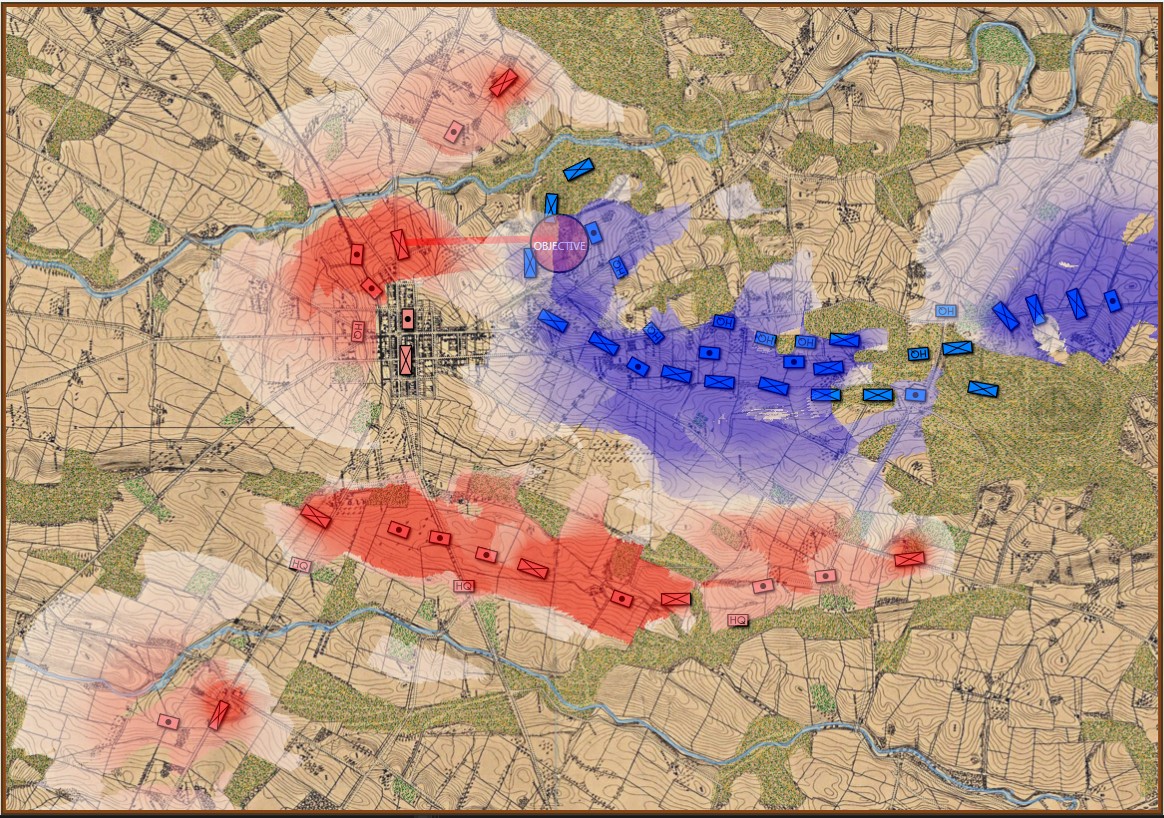
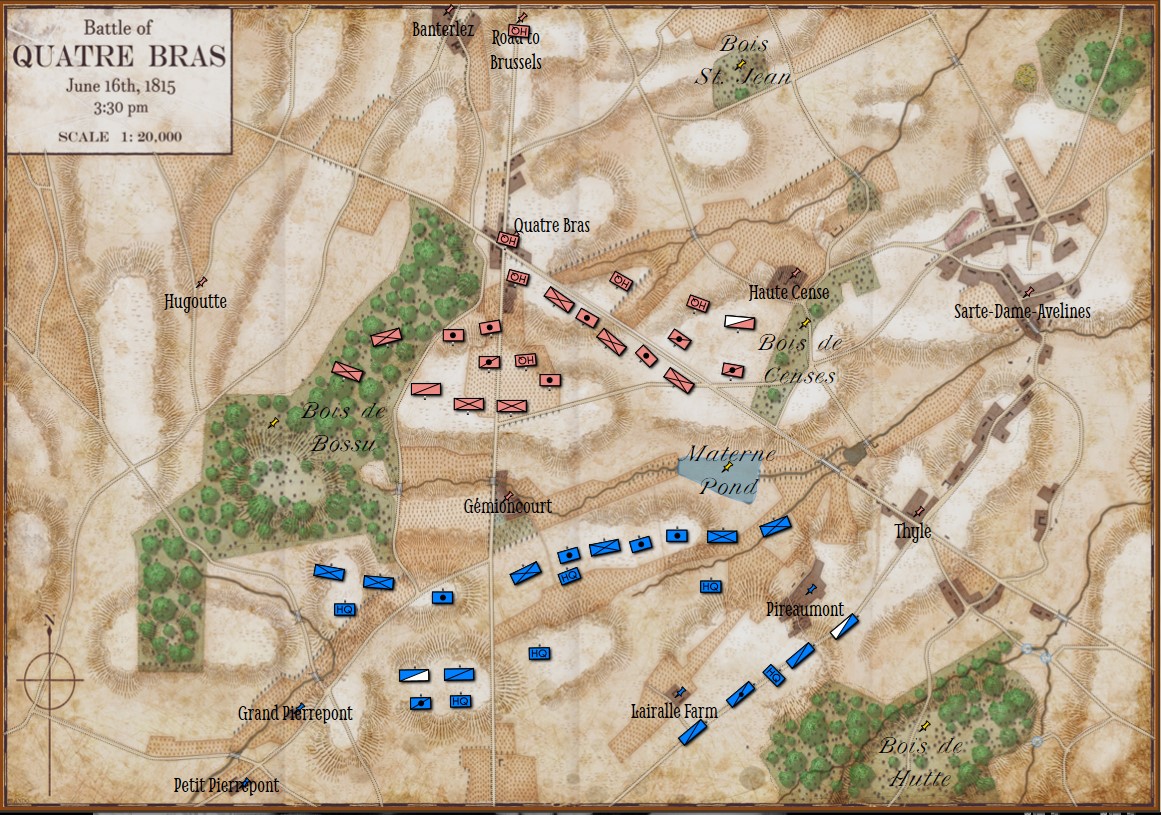
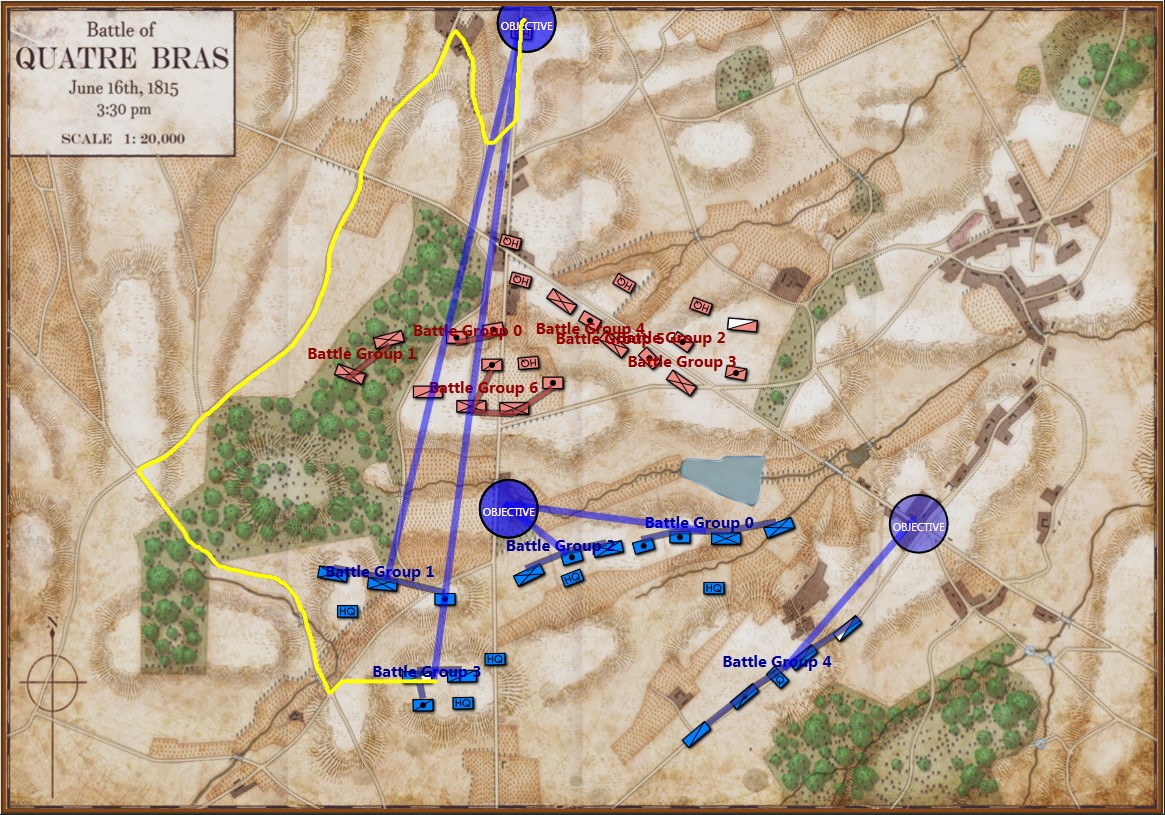
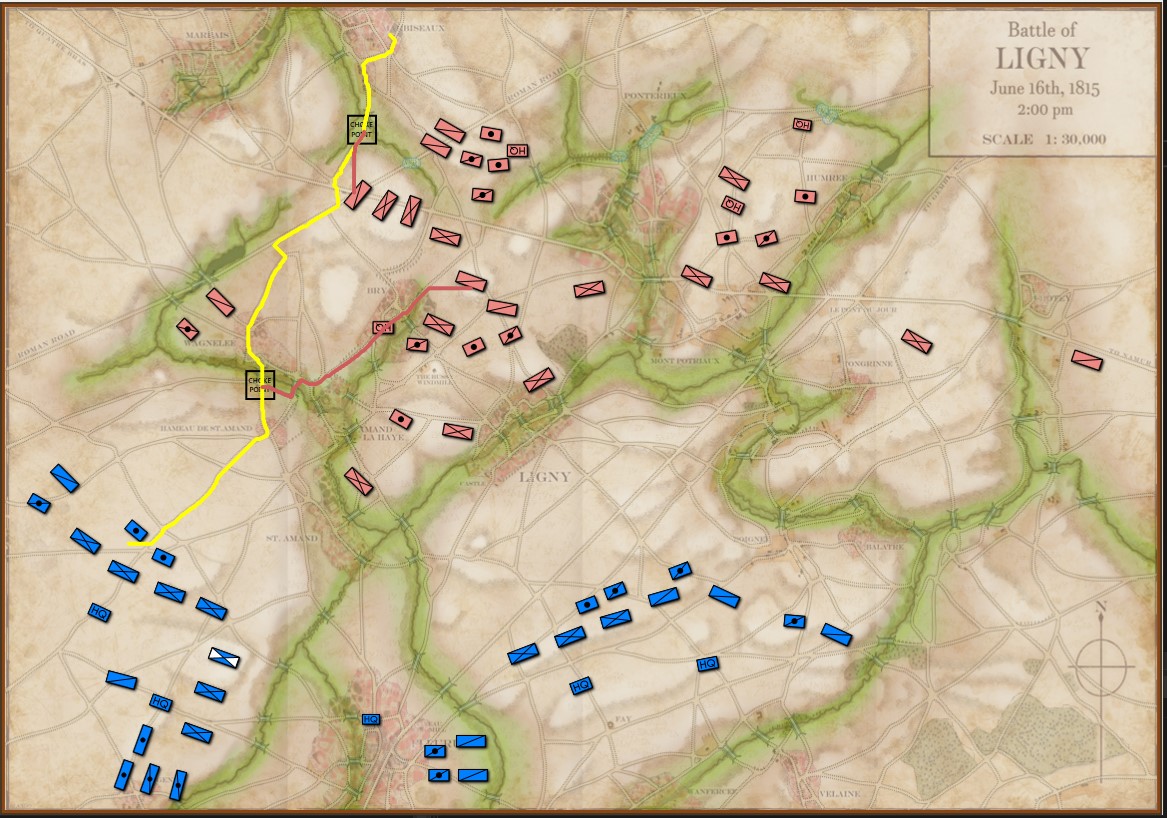
MATE’s selection (labeled OBJECTIVE) for Red Schwerpunkt. Click to enlarge.
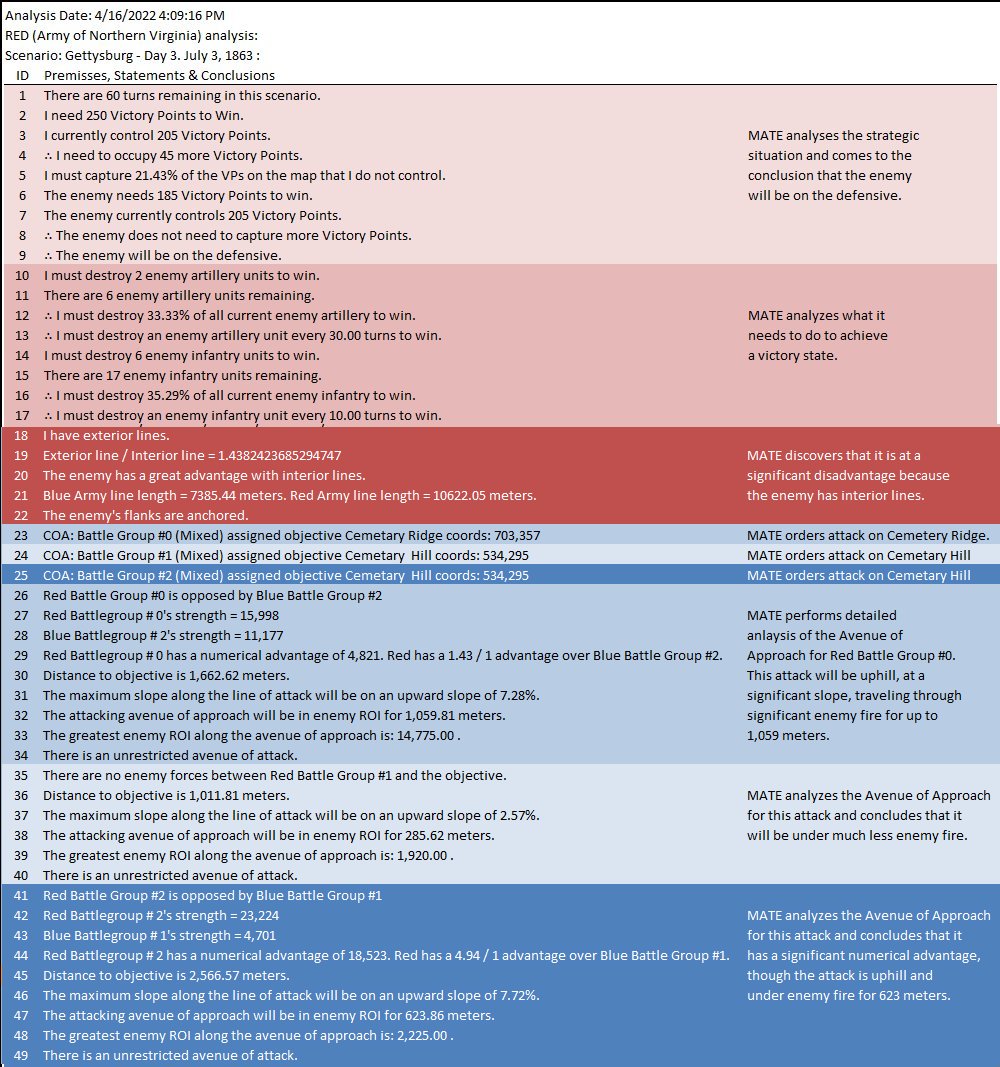
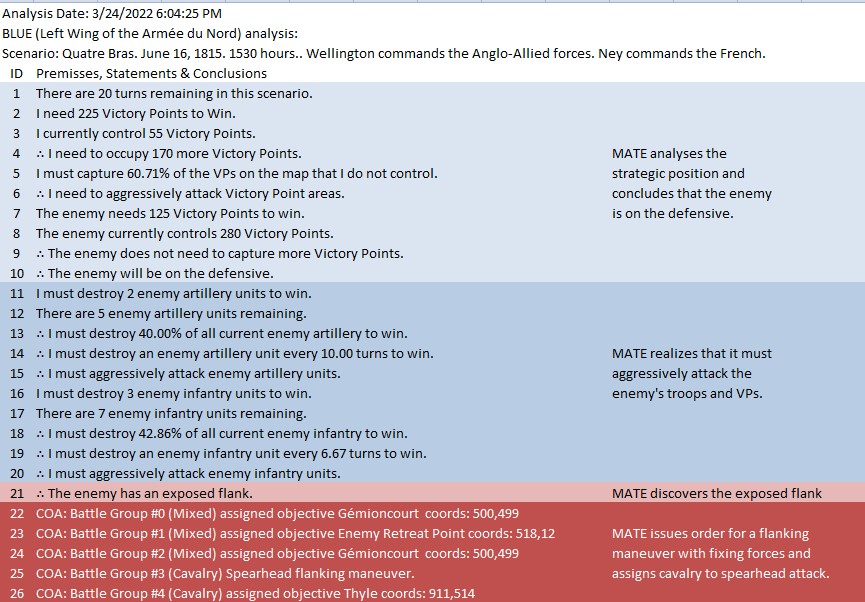
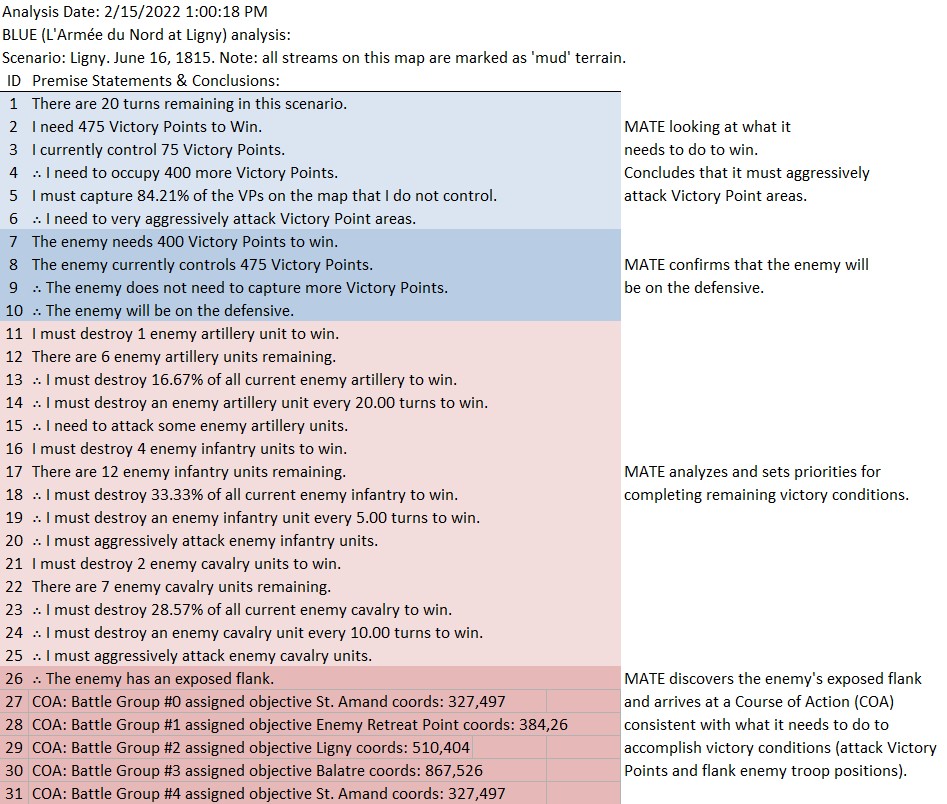
And adds the following commentary (edited for brevity, the numbers are the Premise Statement ID#s. This is basically a logic trace of MATE’s thinking):
8|∴ The enemy does not need to capture more Victory Points.
9|∴ The enemy will be on the defensive.
...
22|The enemy's flanks are anchored.
23|[9] + [22] ∴ Frontal assault is the only remaining option.
...
25|COA: Battle Group #1 (Mixed) assigned objective Weak Point Calculated by ROI coords: 551,232
...
33|Red Battle Group #1 is opposed by Blue Battle Group #6
34|Red Battlegroup # 1's strength = 21,663
35|Blue Battlegroup # 6's strength = 13,635
36|Red Battlegroup # 1 has a numerical advantage of 8,028. Red has a 1.59 / 1 advantage over Blue Battle Group #6.
37|Distance to objective is 1,029.86 meters.
38|The maximum slope along the line of attack will be on an upward slope of 3.64%.
39|The attacking avenue of approach will be in enemy ROI for 541.18 meters.
40|The greatest enemy ROI along the avenue of approach is: 1,276.00 .
41|There is an unrestricted avenue of attack.
In other words, MATE has found a path to its objective that encounters the least amount of enemy projection of force. MATE would much prefer to flank the enemy position but it has calculated that this is impossible (#22, above).
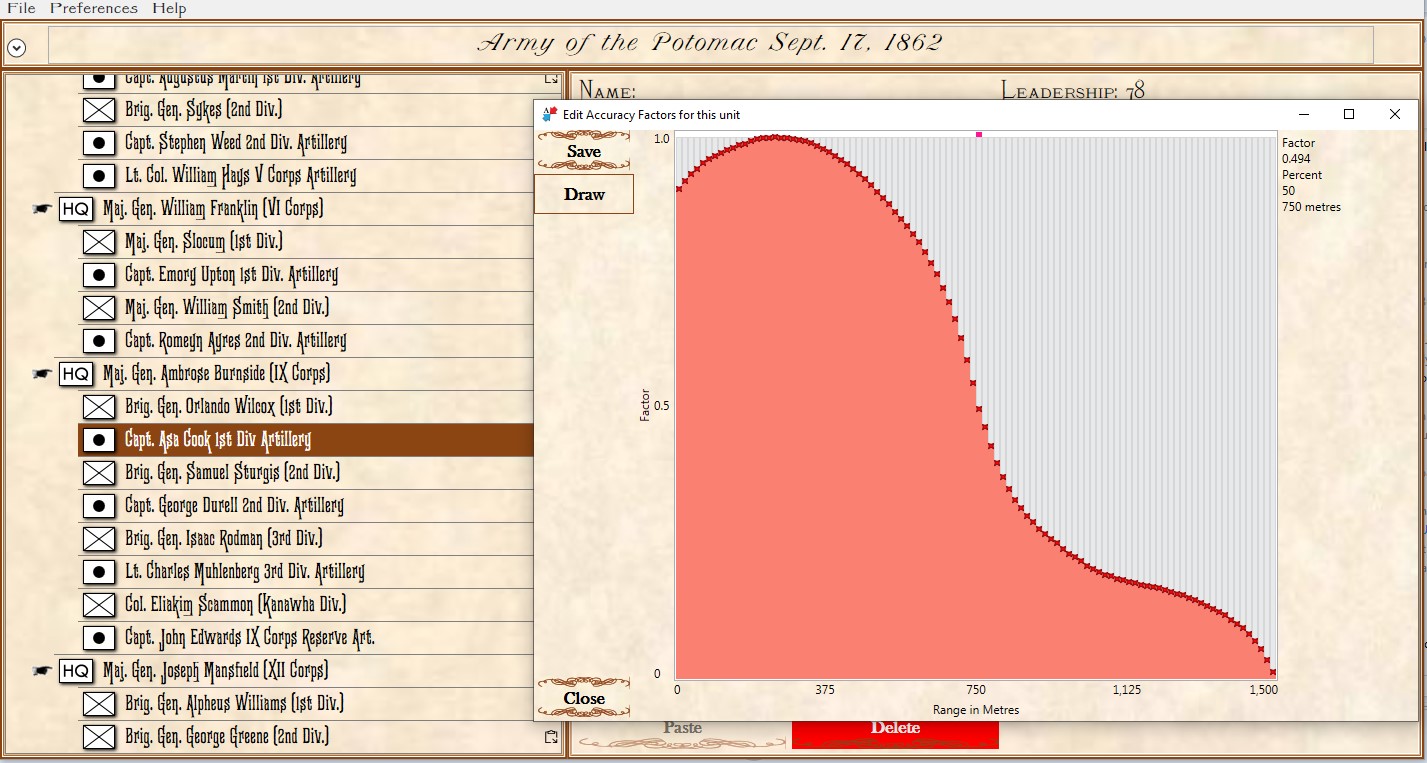
ROI (Range of Influence) is calculated using values set up for each unit in the General Staff Army Editor and running a 3D Bresenham line algorithm to ensure that there is direct Line of Sight (LOS) to that point.
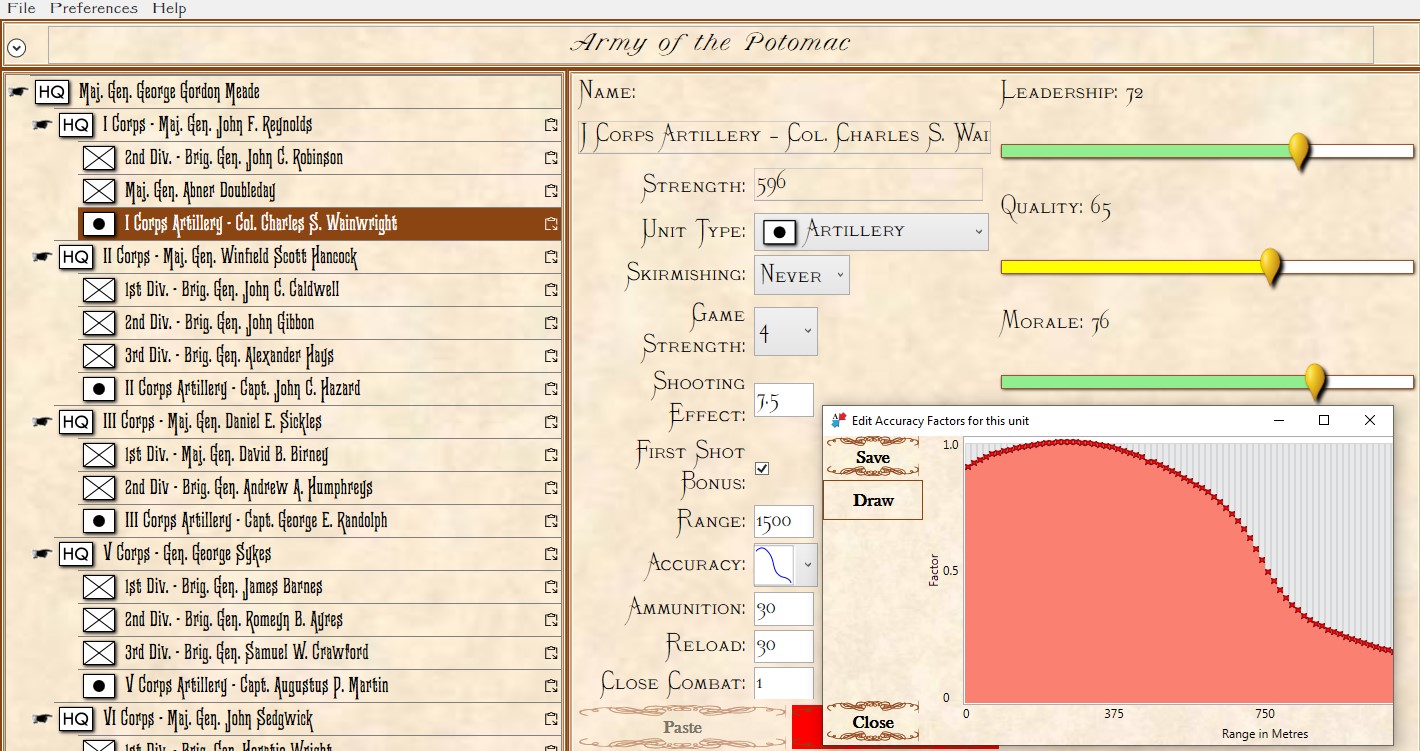
Screen shot of the General Staff Army Editor showing the interface for entering values for a typical artillery unit. Note that the accuracy curve is user editable (there are also default curves for various common weapons). Click to enlarge.
It is because every unit has an accuracy curve attached to it we can exactly map out the overlapping fields of fire (see above) and we can precisely calculate how long each attacking unit will be under fire and its intensity. That is how MATE chooses the optimal attack point: the path where its troops will be under the least amount of fire.
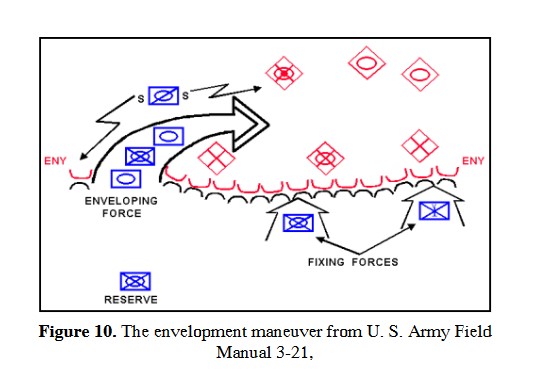
When MATE is presented with a tactical problem it first determines what it needs to do to win; is it on the offense or defense? On the offense, MATE will next check to find the enemy’s open flank and, if there is one, are there any crucial choke points on the flanking route? If MATE is unable to ‘fix and flank’ the enemy, and it has determined that it must be on the offensive, MATE then calculates Schwerpunkt (above). With this new Schwerpunkt algorithm the last big piece of the offensive AI puzzle is in place. Ironically, much of MATE’s defensive calculations involve first figuring out how to attack itself and then countering what it determines are its own optimal moves against itself (see this blog).
As always, please feel free to contact me directly with comments or questions.