Tag Archives: Scenarios

General Staff: Black Powder Battle Designer Bundle on Steam

The General Staff: Black Powder Designer Bundle store on Steam. Click on image to go directly to the Steam store.

I am very pleased to announce that the Steam store for General Staff: Black Powder Battle Designer Bundle is now up and active. More importantly, if you are an early backer, you should have received your Steam key to download it by now. If you are an early backer and have not received an email with your Steam key, please contact me directly.

Some important things to know:

The Battle Designer Bundle does not include the actual game! The game is a different install package and, hopefully, will be in beta in the next month or two. If you are an early backer and received a Steam key for the Battle Designer Bundle you will also receive a second Steam key, when available, for the actual game and you will be welcome to participate in beta testing, too.

The Battle Designer Bundle includes everything you need to create your own armies, maps and scenarios for use in the actual game. The Battle Designer Bundle includes the Army Editor, the Map Editor and the Scenario Editor. The Map Editor supports a digitizing tablet (if you’re lucky enough to have one and the talent to use one, I don’t).

I need your suggestions for a battle that I can use to create video tutorials for the Army, Map and Scenario Editors. If you have suggestions, please contact me directly. However, it’s important to remember that I need a good Order of Battle (OOB) table that includes unit strengths. I also need a good quality map that is at least 1155 x 805 pixels (resolution). If it’s an old battle map, I need somebody to take the time to remove the units from the map. For example, here’s the original map of Antietam from the Library of Congress:

Map of the battle of Antietam from the Library of Congress. Willcox, William H. Map of the battlefield of Antietam. [Philada., Lith. of P. S. Duval & Son, 1862] Map. Click to enlarge.

And here it is after I cleaned it up, removed the units and rotated it 90 degrees:

The Antietam map after I removed all the units, cleaned it up, lightened it and rotated it 90 degrees. Click to enlarge.

I’m looking forward to receiving your scenario suggestions and creating the video tutorials. The tutorials will be posted here and on our YouTube channel.


I Was Wrong About George Washington

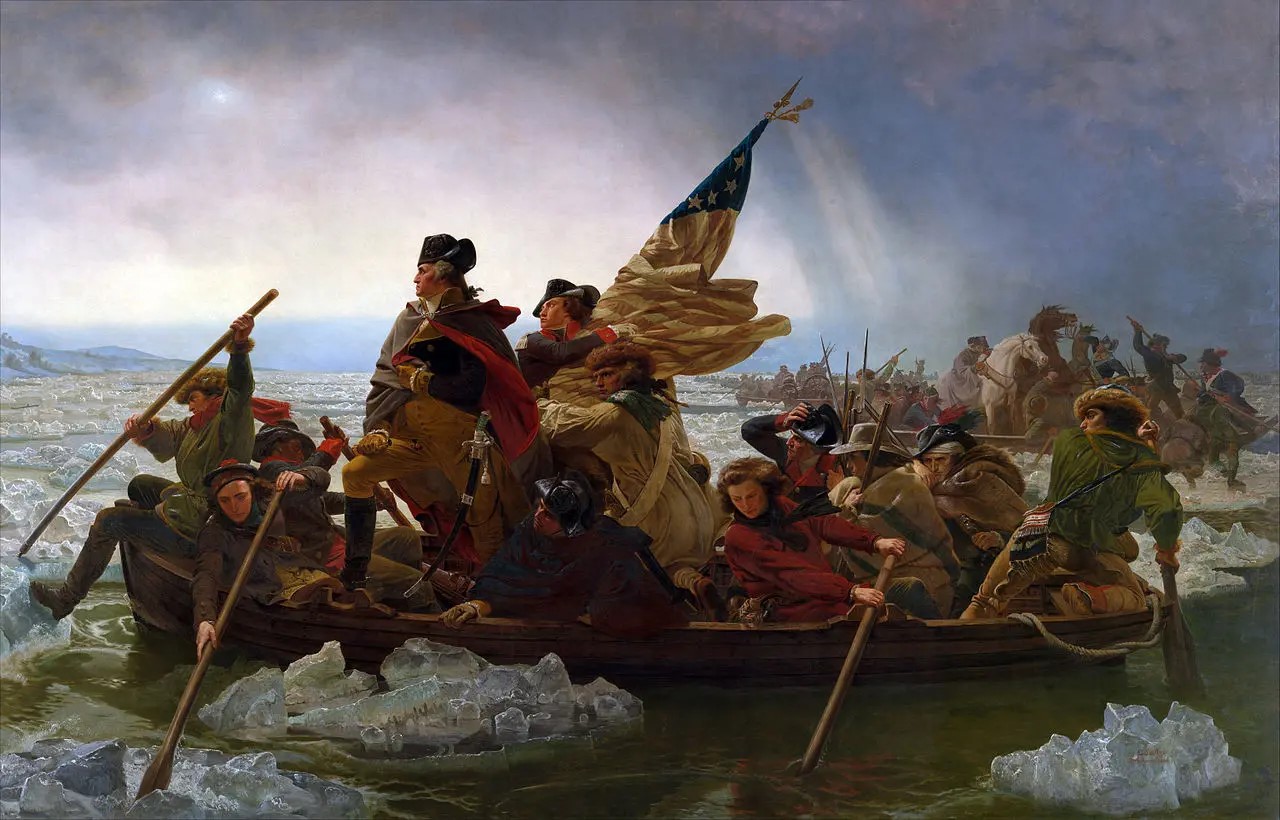
Washington Crossing the Delaware by Emmanuel Luetze. 1851. The Metropolitan Museum of Art. Click to enlarge.

I must confess that I was never much a fan of George Washington’s generalship. Having not studied American Revolution military history I thought that from 1776-1781 the British chased Washington and his sad excuse for an army up and down the eastern seaboard of what was to become the United States until the French Comte de Grasse defeated the British naval forces at the Battle of the Chesapeake and the Comte de Rochambeau at the head of a French army surrounded, besieged and eventually captured, Cornwallis at Yorktown.

To make matters worse, years ago I stumbled upon George Washington’s Expense Account which is, frankly, brutal. Washington turned down the magnanimous salary of $500 a month for being Commander in Chief of the Continental Army famously saying,

“As to pay, Sir, I beg leave to Assure the Congress that as no pecuniary consideration could have temped me to have accepted this Arduous employment (at the expense of my domesttic [sic] ease and happiness) I do not wish to make any Proffit [sic] from it. I will keep an exact Account of my expences. Those I doubt not they will discharge, and that is all I desire.” 1)George Washington’s Expense Account, Washington, George & Kitman, Marvin, page 15

If Washington had accepted the salary he would have been paid $48,000 for five years’ service. Instead, his ‘expences’ came to $449,261.51! This book – and it contains a photocopy of every page of Washington’s Expense Account in fine copperplate handwriting along with a humorous explanation of the expense – is damning. Washington’s very first entry for June, 1775 was for $6,214 (over an entire year’s salary at $500 per month) for “…the purchase of five Horses… to equip me for my journey to the Army at Cambridge – & for the Service I was Then going upon  – having sent my Chariot and Horses back to Virginia.” There are also numerous expenses for cases of the finest wines and plenty of food while at Valley Forge. Not surprisingly, when Washington offered Congress the same terms when he was elected president (no salary just expenses) Congress insisted that he take $25,000 a year; no expenses paid.

Like most Americans, what little knowledge I had of the battle of Trenton can be summed up in Luetze’s famous painting, above: Washington, posed heroically, crossed the Delaware River on Christmas Eve and surprised a garrison of drunken Hessian mercenaries at Trenton capturing them all without a shot. In reality, not much of that is true. Yes, Washington did attack Trenton but it was on the morning of December 26, 1776, and the Hessians weren’t drunk; they fought bravely and their commander, Col. Johann Gottlieb Rall, died leading them.

Then I discovered (from reading David Hackett Fischer’s Pulitzer Prize-winning Washington’s Crossing) that the amazing part of the story wasn’t the battle of Trenton (which really was an extraordinary tale of a small, poorly-equipped, non-professional army making an audacious amphibious crossing of an ice-choked river) but the campaign that followed the victory from December 30, 1776 to January 3, 1777.

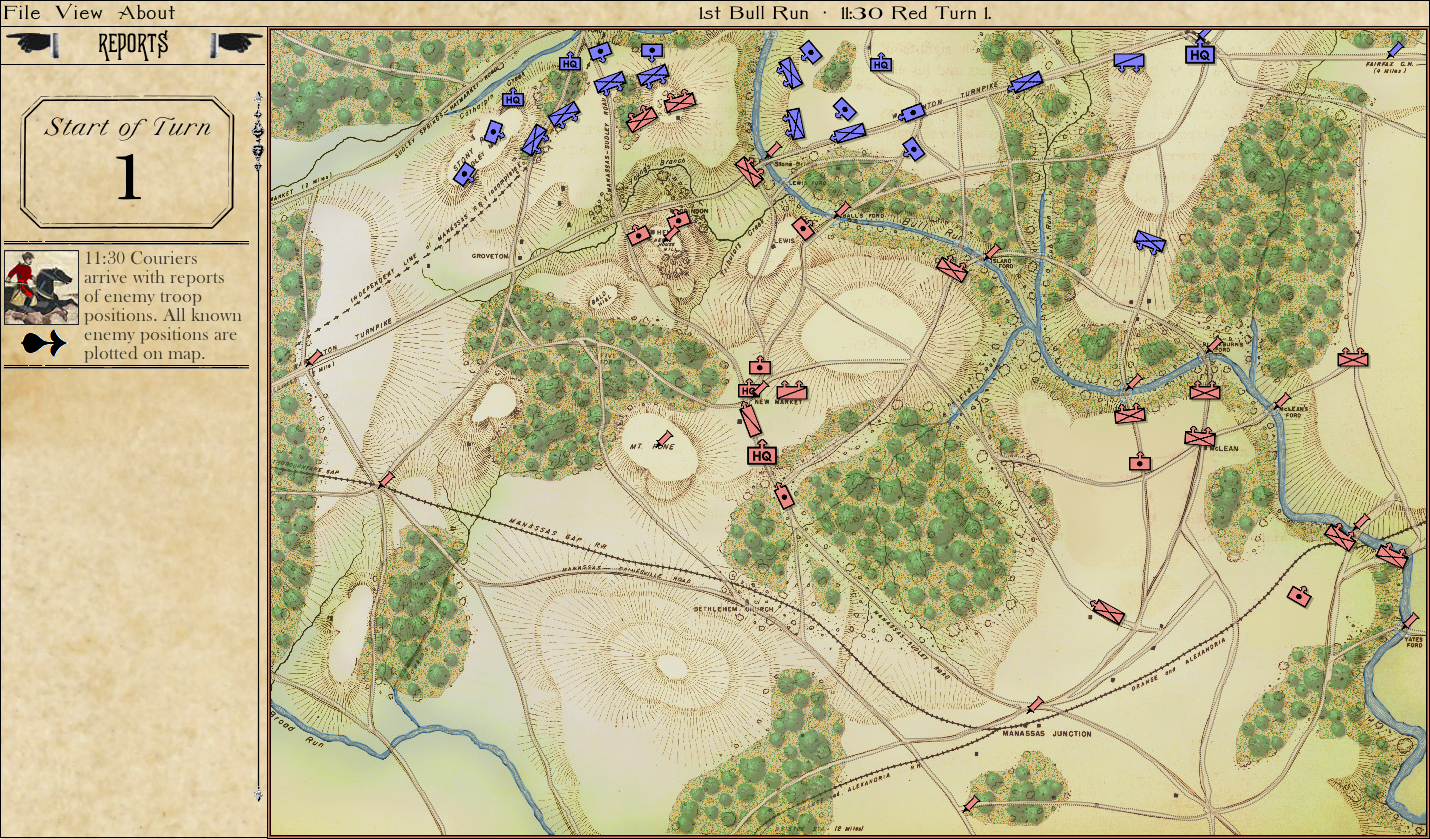
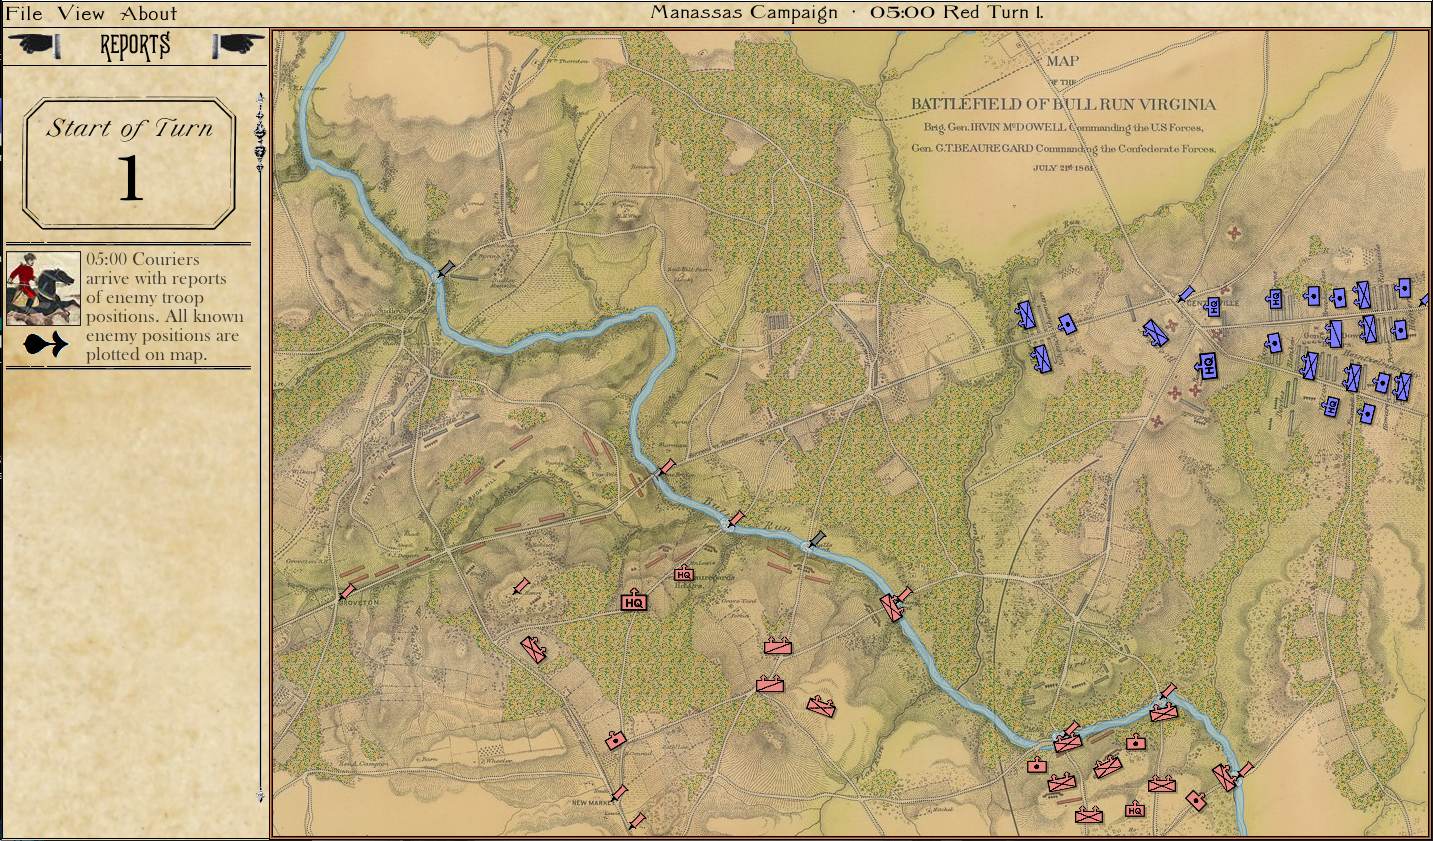
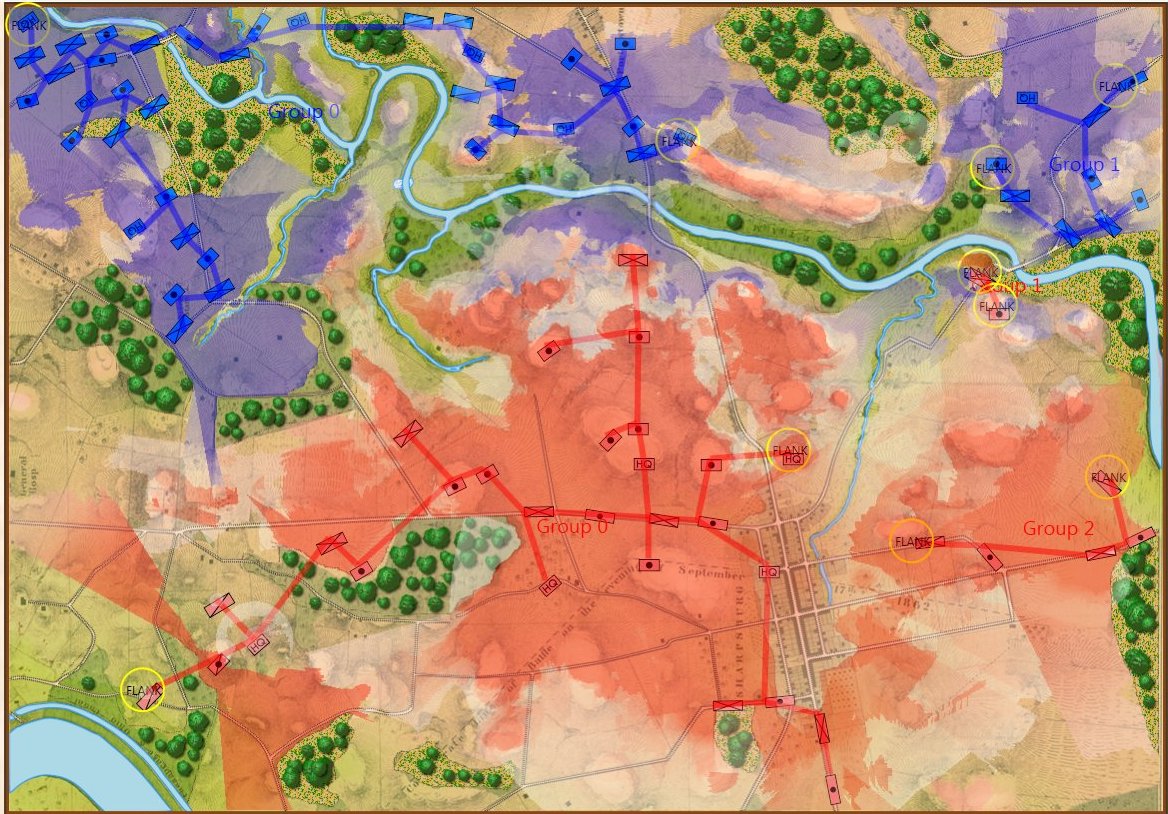
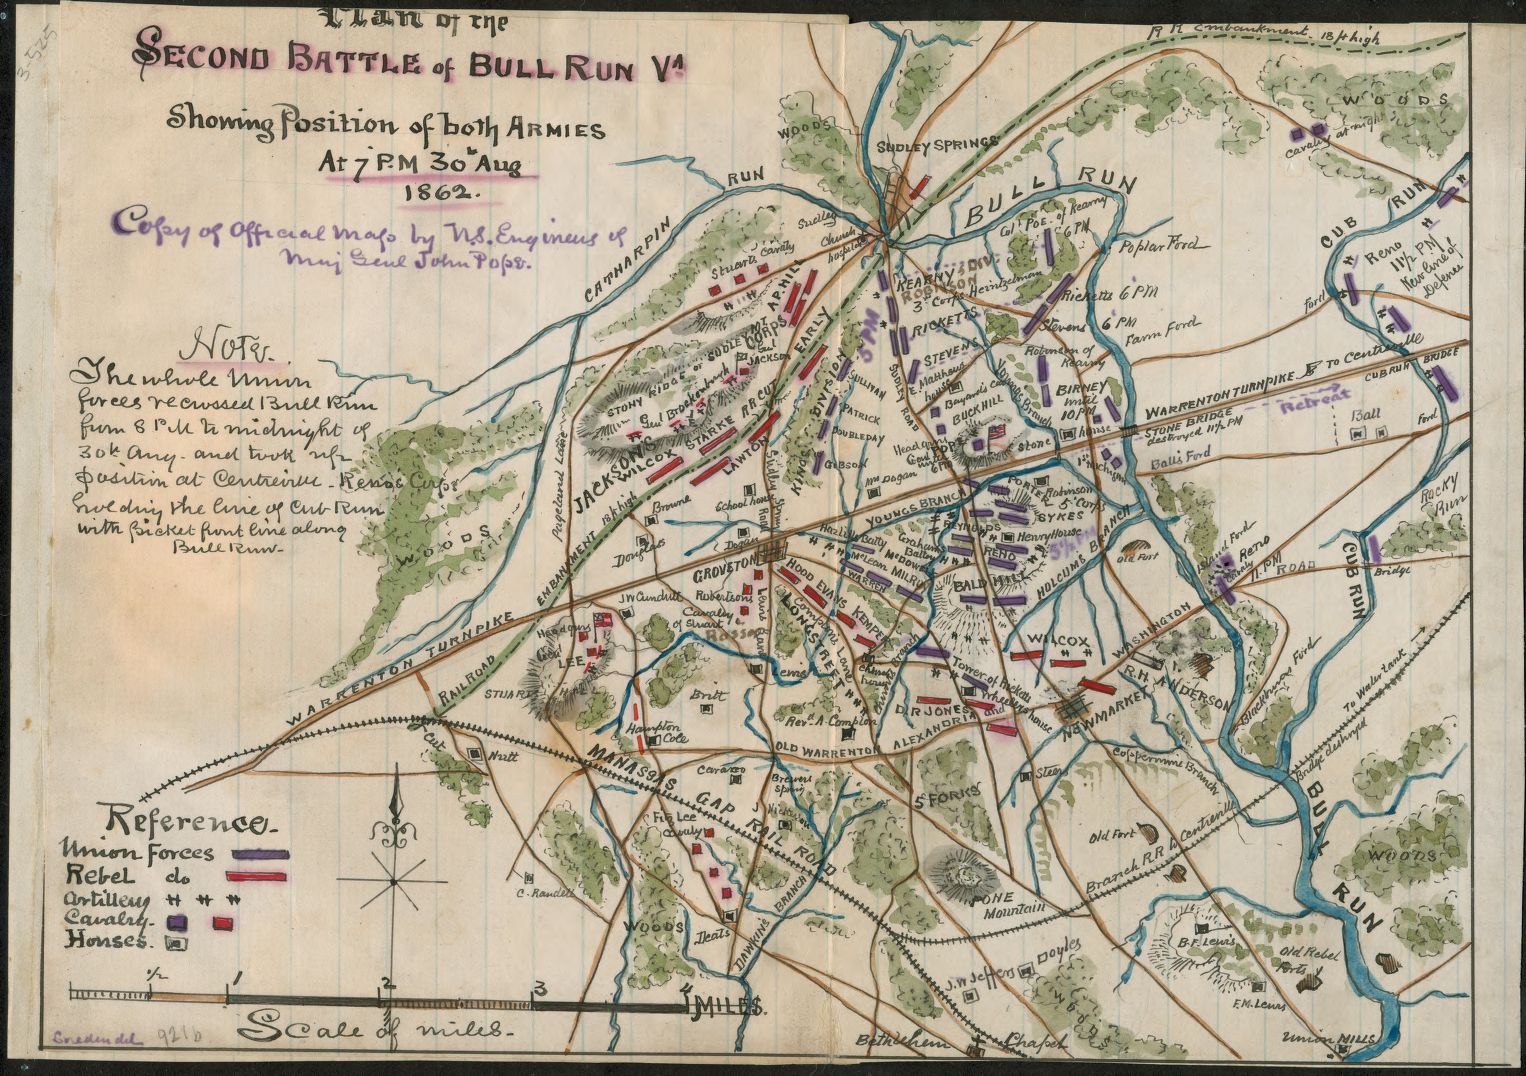
The strategic situation in the Princeton / Trenton area, December 29, 1776. Screen shot from the General Staff Scenario Editor. Click to enlarge.

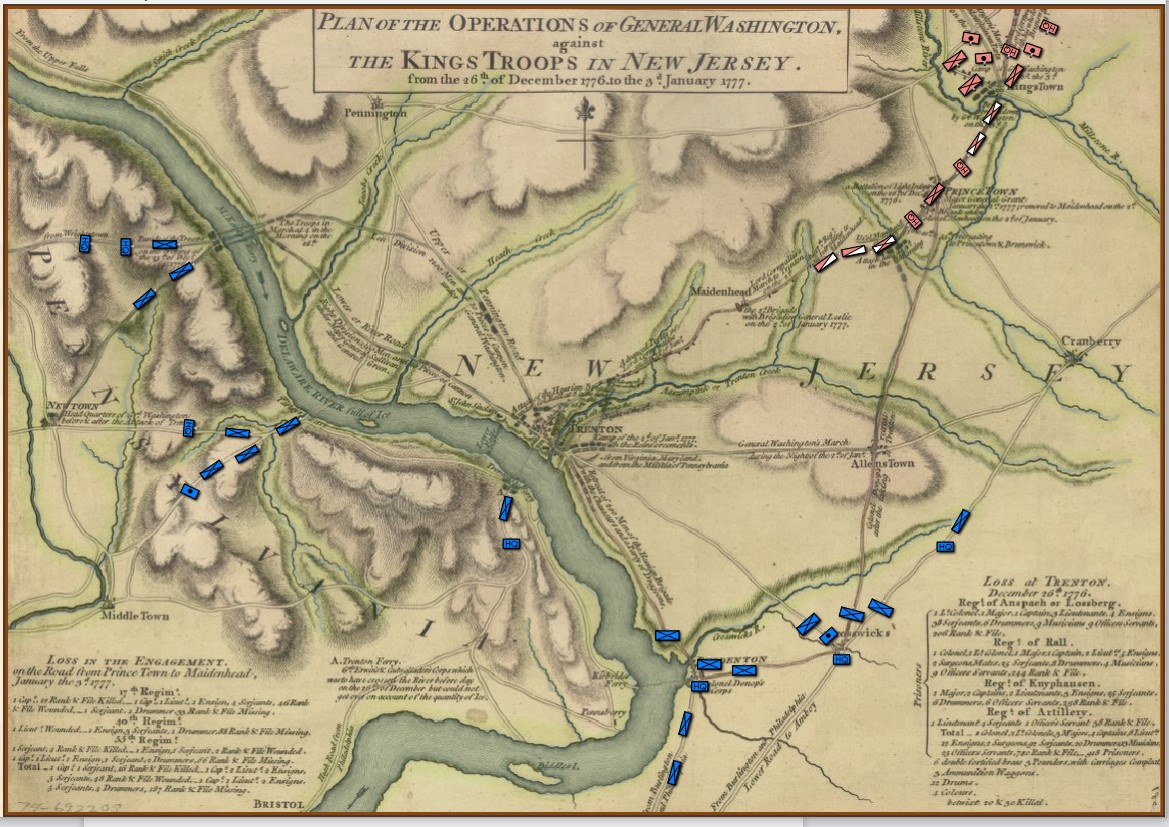
Washington’s forces had made it safely back across the Delaware River after the Trenton raid but he now faced a difficult decision: terms of enlistment were running out for many units in his army and he feared taking the field again in bitter cold with a diminished force. As always, Washington held a council of war. As the senior commanders of the army advised caution a courier arrived informing them that Brigadier General John Cadwalader with his Pennsylvania militia had already crossed the Delaware and was at Crosswicks itching for a fight with the British (this is the blue force at the bottom of the map, above). After more discussion, one group stated, “tho’ they would not have advised the Movement, yet it being done it ought to be supported.”2)Washington’s Crossing, David Hackett Fischer page 266. Eventually, with Washington’s urging, the council voted to support Cadwalader, recross the Delaware and, again, defeat the British in the field.

This was a bold strategy; a defeat of the Continental Army with its back to a river would probably spell the end of the revolution. Washington’s plan was to assemble his forces east of Trenton, in a strong defensive position on ‘good ground’ behind the Assunpink Creek and lure Cornwallis, who was commanding the British and Hessian forces, to attack. This Cornwallis did and was soundly defeated. Washington now moved decisively, sending his forces to capture Prince Town (Princeton) to the north. At the crucial moment in this battle Washington rallied the routed Pennsylvania forces saying, ” ‘Parade with us, my brave fellows! There is but a handful of the enemy, and we will have them directly.’ Washington [then] led his men straight into the center of the battle, within thirty paces of the British line. He was mounted on a white horse, an easy mark for any British soldier.”3)Ibid. page 334

Frankly, I cannot comprehend such bravery. The attack, of course, was a success and the Americans captured Princeton and, perhaps more importantly, demonstrated that their volunteer army would fight, could fight and could win. Washington showed superb strategic and tactical vision throughout these ten crucial days4)See https://tencrucialdays.org/wp-content/uploads/2019/09/eb14b5212fb62dfea8d100f3efd1950f.pdf  for a wonderful series of maps that cover this campaign as well as extraordinary personal courage.

I was wrong about George. Washington.

References

References
1 George Washington’s Expense Account, Washington, George & Kitman, Marvin, page 15
2 Washington’s Crossing, David Hackett Fischer page 266
3 Ibid. page 334
4 See https://tencrucialdays.org/wp-content/uploads/2019/09/eb14b5212fb62dfea8d100f3efd1950f.pdf  for a wonderful series of maps that cover this campaign

AI Routines Added But We Need More Testing Data (Maps & Armies)

The AI routines for calculating battle lines and range of influence have been ported over from the original C++ code to C#:

Antietam displaying Range of Influence and Battle Lines. Click to enlarge.

I’ve written a number of blog posts about these AI routines which you may find interesting:

Battle Lines, Commanders & Computers

What’s Wrong With This Picture?

Wargame AI Continued: Range of Influence

That’s the good news. The bad news is that I’m also installing the Machine Learning AI that was the basis of my doctoral research and it needs more battles to learn from. A lot more. Currently there are 15 armies (click here) and 5 maps (click here). Ideally I would like about 50 armies and 30 maps used to create 30+ battle scenarios.

Are you a cartographer or a researcher?  If you are, and you’re interested, I could use your help if you would like to volunteer. All the maps and armies were created using the tools that you, as a backer, have already been provided: The General Staff Army Editor and The General Staff Map Editor. A little bit of PhotoShop or another paint program was used to clean up the old maps and a free program, Inkscape, was used to create the paths for roads and rivers. The most difficult task is the research. Finding Order of Battle Tables (OOBs) are pretty easy but General Staff requires knowing the actual troop strength of every unit. Sometimes, that is very hard to find. For the maps, adding elevation is usually the most difficult bit, but there are a number of built-in tools to make this easier.

If you’re interested in helping add to the data files please contact me directly: Ezra@RiverviewAI.com.

Free Scenarios Twenty-One Through Twenty-Five

We asked you for your Top 30 battles that you would like to see included free with General Staff for supporters of our Kickstarter campaign. We have previously announced the first twenty vote-getters. Today we are announcing the next five. One of the interesting features of General Staff is the ability to combine any two armies with a map to create a scenario. We use this feature for two day battles (such as Wagram and 2nd Bull Run) effectively creating two completely different battles (with two different armies) but using the same battlefield map.

This map of the battle of Alma was created only two years after the battle. Click to enlarge.

The battle of Alma is our first foray into the Crimean War. The Russians, though outnumbered, have the heights with their guns entrenched in heavy fortifications. The British and the French suffer numerous communication breakdowns. The battle seesawed back and forth until a final assault by the Highland Brigade carried the day and the Russians broke and fled from the battlefield. Playing the Allies will test your ability to coordinate attacks via messengers. Playing the Russians will require skillful coordination of counterattacks.

Wagram was a two day battle with the first day involving crossing the Danube. Click to enlarge.

On May 21st and 22nd Napoleon had attempted to cross the Danube at Lobau Island only to be turned back by Archduke Charles. Now, after over a month of preparations and reinforcements, Napoleon was ready to try again.

We present two distinct scenarios for the battle of Wagram: the first representing the situation on July 5th and Napoleon’s second attempt at crossing the Danube and establishing a beachhead and the second the battle of July 6th in which Archduke Charles attempted a double envelopment of Napoleon’s army. Only Napoleon’s hastily created ‘grand battery’ of artillery, a desperate cavalry charge and a counterattack by MacDonald’s corps saved the day. The Austrians eventually broke and fled the battlefield and sued for an armistice which ended the 1809 war.

Plan of the second Battle of Bull Run Va. Showing position of both armies at 7 p.m. 30th Aug. 1862. From the Library of Congress. Click to Enlarge

After General George McClellan’s disastrous Peninsula campaign, President Lincoln appointed Major General John Pope to lead the newly formed Army of Virginia and was tasked with the missions of protecting Washington D.C. and clearing the Shenandoah Valley of Confederates. McClellan, who never responded promptly to orders even in the best of circumstances, simply ignored commands to begin transferring his army from the peninsula southeast of Richmond up to Pope in front of Washington. Lee, knowing that McClellan had a bad case of the ‘slows’ took advantage of his interior lines to rapidly move his forces north to destroy Pope before McClellan’s troops could reinforce him.

The battle on the old Mananas battlefield began on August 28, 1862 with Jackson (commanding the left wing) shelling the passing Union column of King’s division (which included the soon to be famous Iron Brigade). The Iron Brigade, though outnumbered, attacked and fought Jackson’s famous division to a standstill. However, Jackson’s attack was primarily a feint employed as a ‘fixing force’ for an envelopment maneuver; Longstreet’s corps was expected to appear on the Union’s unprotected left flank.

On the second day, August 29th, Pope attempted to initiate a double envelopment against Jackson. However, Longstreet had now appeared on the battlefield at exactly the wrong place for Pope’s envelopment maneuver. The day was marked with incredibly poor communications between Pope and his subordinates and ended mostly as it began with neither side gaining or losing much ground.

The third day, August 30th, began with Longstreet’s counterattack on the Union’s exposed left flank. Again, incredibly poor communications between Pope and his subordinates turned a bad situation into a disaster. Unlike the first battle of Bull Run, the Union army fell back on Washington in an orderly column through an extremely limited avenue of retreat over Bull Run.

Free Scenarios Sixteen Through Twenty!

We continue our list of the thirty most desired 18th and 19th century battles (as voted on by you) with numbers sixteen through twenty. All thirty scenarios will ship with General Staff, as well as the Army Editor, the Map Editor and the Scenario Editor to early supporters of General Staff on Kickstarter.  After Kickstarter these scenarios, and the software editing suite, will be available as digital downloads (DDL).

The battle of Shiloh created for the Topographical Engineers in 1866. From the Library of Congress. This is a great image. Please click to greatly enlarge.

If you have ever visited the site of the battle of Shiloh (Pittsburg Landing, Tennessee) your first thoughts were probably, “how could two large armies fight in this forest?” There are, of course, clearings where significant events took place and where the Union encampments were attacked, but Shiloh is mostly deep forest cut with ravines and a few paths and roads.

Shiloh was also a two-day battle with the first day ending as a major Confederate victory and the second a Union triumph. Grant’s Army of the Tennessee was bivouacked alongside the Tennessee River after its victories at Forts Donelson and Henry. Union commanders, including Sherman, ignored reports of Confederate activity in the vicinity. When the Confederates attacked on April 6 the Union forces were overwhelmed.

Plaque on the Shiloh battlefield indicating the location of Grant’s HQ. Click to enlarge.

On the evening of April 6-7, 1862 a terrific thunderstorm fell across the battlefield. Grant’s headquarters had been taken over as a field hospital and so he retreated to a tree where he stood in the rain holding a lantern in one hand and smoking a cigar. Grant’s subordinate commanders had decided that the battle was lost and that the army’s only hope was to abandon the artillery and baggage and ferry the troops across the river. Nobody wanted to approach Grant and, eventually, Sherman was induced to talk to him. He found Grant under this famous tree.

Not knowing exactly how to start the conversation he began by saying to Grant, “Well, Grant, we certainly had the Devil’s own day.”

“Yes,” said Grant, the end of his cigar glowing in the dark, “Going to whip ’em tomorrow, though.”

The Confederates ordered an attack against Grant’s troops at dawn. Grant ordered an attack on the Confederates an hour before dawn. The rest is history.

Positions in the morning of Day 2 of the battle of Eylau. Click to enlarge.

Though Eylau is listed as one of Napoleon’s great victories on the Arc de Triomphe, in reality it was a massacre in a blizzard that ended in a slight French tactical victory and a minor Russian strategic success.

Two large armies (the French and the Russian / Prussian armies were approximately the same size at 75,000 troops) occupied parallel ridge lines separated by a valley. It was February in Poland and the weather was freezing and snowy. Obviously, the weather conditions greatly effected troop speeds. It is very easy in General Staff to adjust unit speeds to reflect various weather conditions (see here).

At a critical juncture Napoleon ordered Murat to charge the Russian center with his 11,000 strong force. Though this was one of the largest cavalry charges of all times, this dubious honor actually belongs to the Polish and German cavalry at the battle of Vienna September 12, 1683 with an estimated force of 20,000.

Murat’s famous cavalry charge at Eylau painted by Jean-Antoine-Siméon Fort. Click to enlarge.

Murat’s charge stabilized Napoleon’s center and the Russian and Prussian troops withdrew from the battlefield that night. The French were too exhausted to pursue. After the battle, the late arriving Marshal Ney famously observed: “Quel massacre! Et sans résultat” (“What a massacre! And without result”).

The battle of Leuthen. Positions after Frederick the Great’s right flank envelopment maneuver. Click to enlarge.

At the battle of Leuthen, Frederick the Great performed a classic envelopment maneuver that crushed a much larger Austrian force. There are many ways to describe an envelopment maneuver but this clip from the movie Animal House has always been a favorite:

While distracting your opponent (“Greg, look at my thumb!”) you clock your enemy with a roundhouse punch.

In military terms, the distraction is called the ‘fixing force’ and the roundhouse punch is, “the enveloping force.” Frederick the Great assigned a small ‘fixing force’ to distract his enemy while the main force traveled behind a hill, hidden from sight.

The artificial intelligence (AI) for General Staff ‘knows’ the envelopment maneuver and prefers it over all forms of attack. Below are figures describing the implementation of the envelopment maneuver from one of the author’s papers:

Figures from the author’s, “”Implementing the Five Canonical Offensive Maneuvers in a CGF Environment,” illustrating the TIGER AI’s implementation of the envelopment maneuver. Click to enlarge.

The AI is keenly aware of 3D Line of Sight (see here) and will take advantage of intervening terrain (as did Frederick the Great) to hide its maneuvers. You have been warned.

The French are surrounded at the battle of Sedan. Click to enlarge

The battle of Sedan  ended the Franco Prussia war when the French army (commanded by Emperor Napoleon III) was surrounded and captured by  the German and Bavarian army (commanded by Helmuth von Moltke). As a scenario this will obviously turn on, “Can the French break out of the trap?”