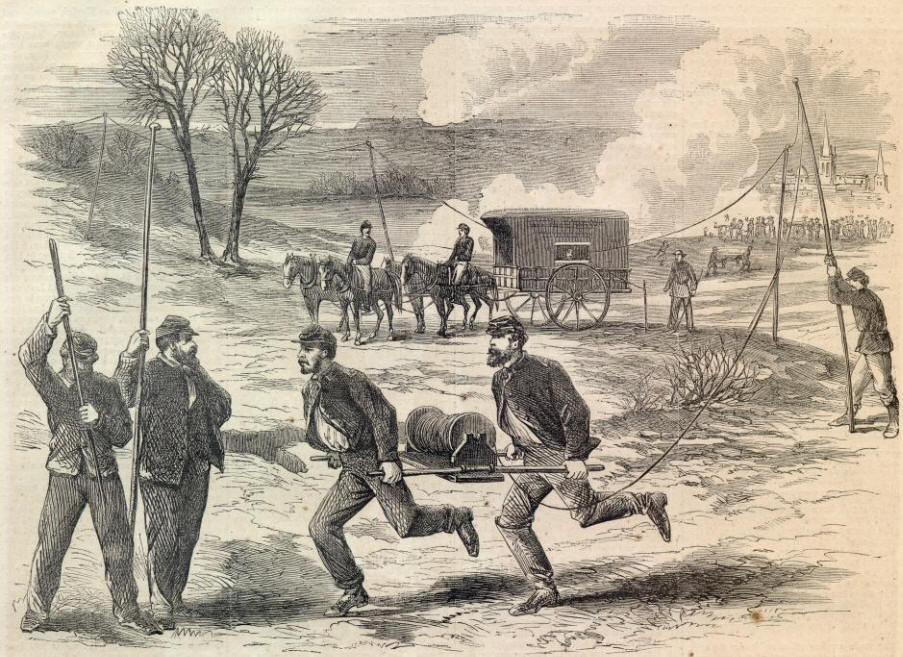
Yes, there were telegraph lines during the American Civil War, but orders in battle were not delivered instantaneously. There were also semaphores and signal stations, but the truth of the matter is that there was always some delay between the Commanding General issuing orders and the units receiving them.
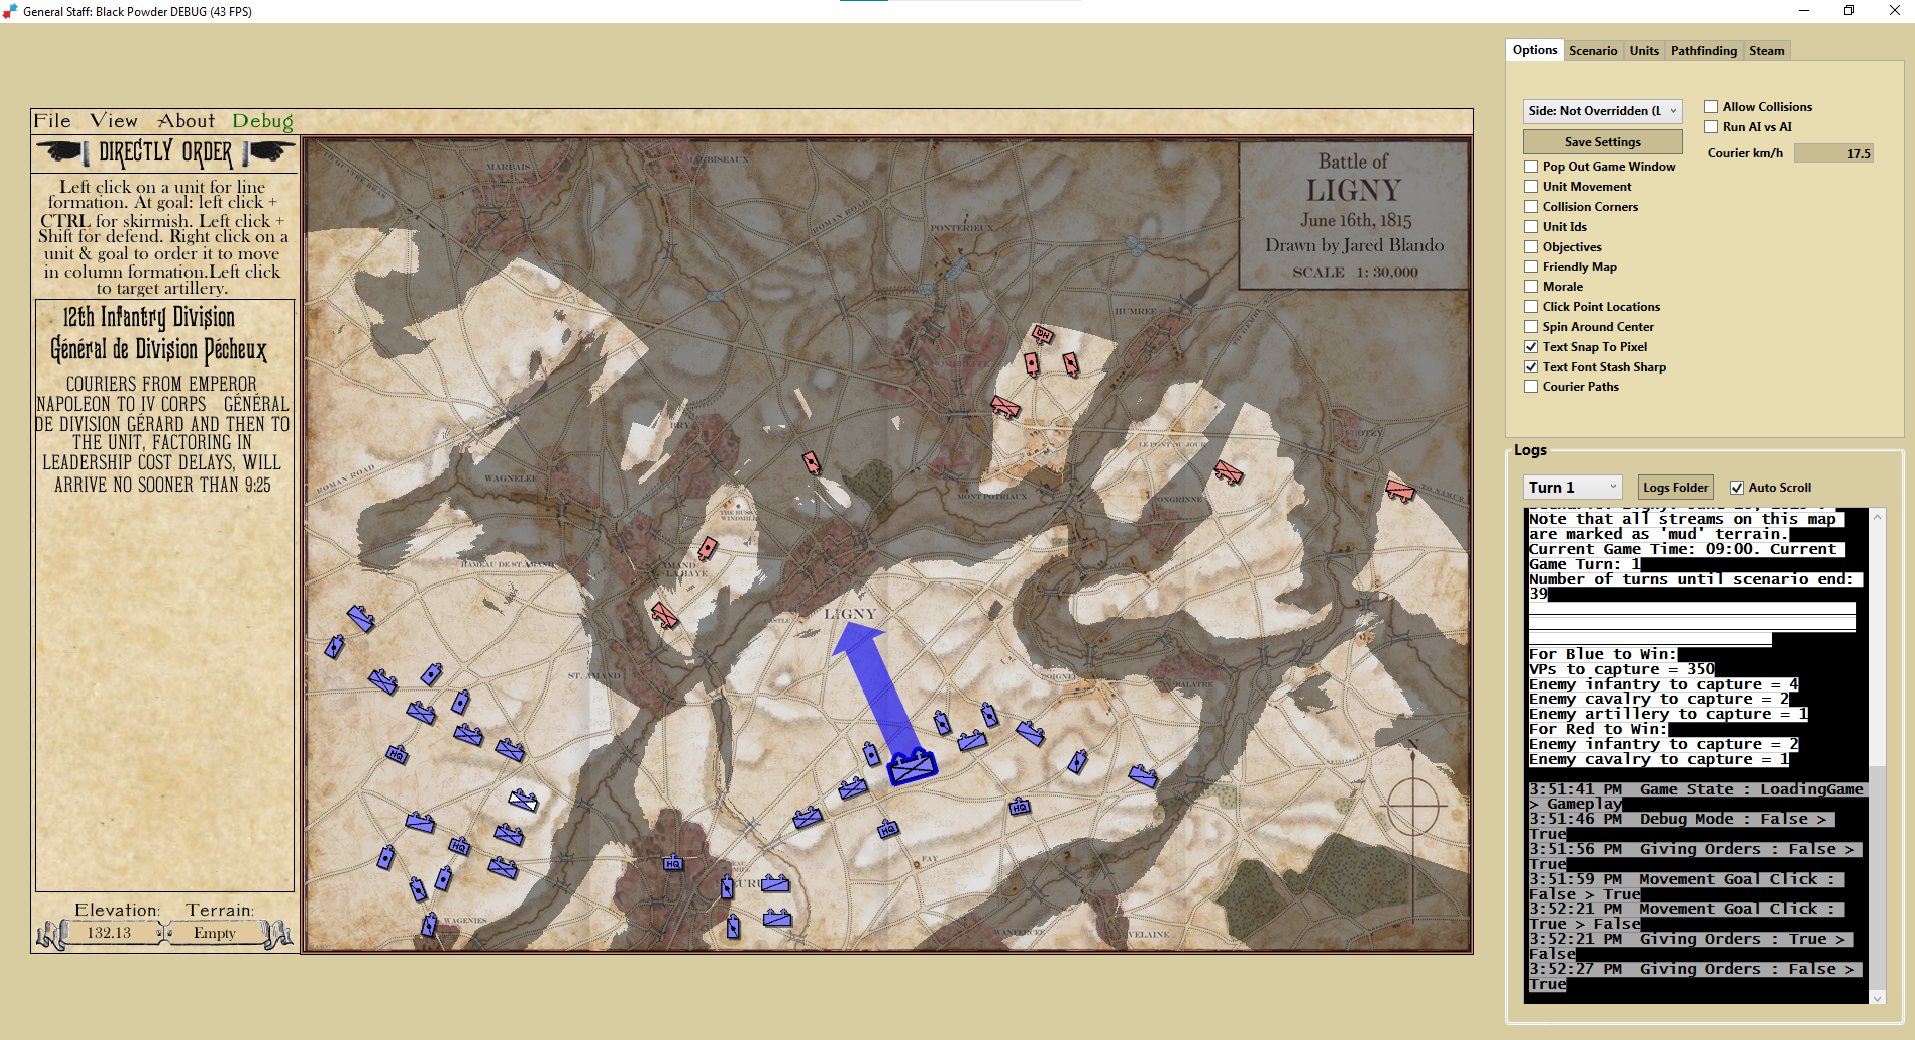
When I first designed General Staff: Black Powder I decided to make this the ultimate in accuracy for historical battlefield simulations. The time it would take for every courier to travel from one HQ to a subordinate HQ and then on to the specific units was precisely calculated.
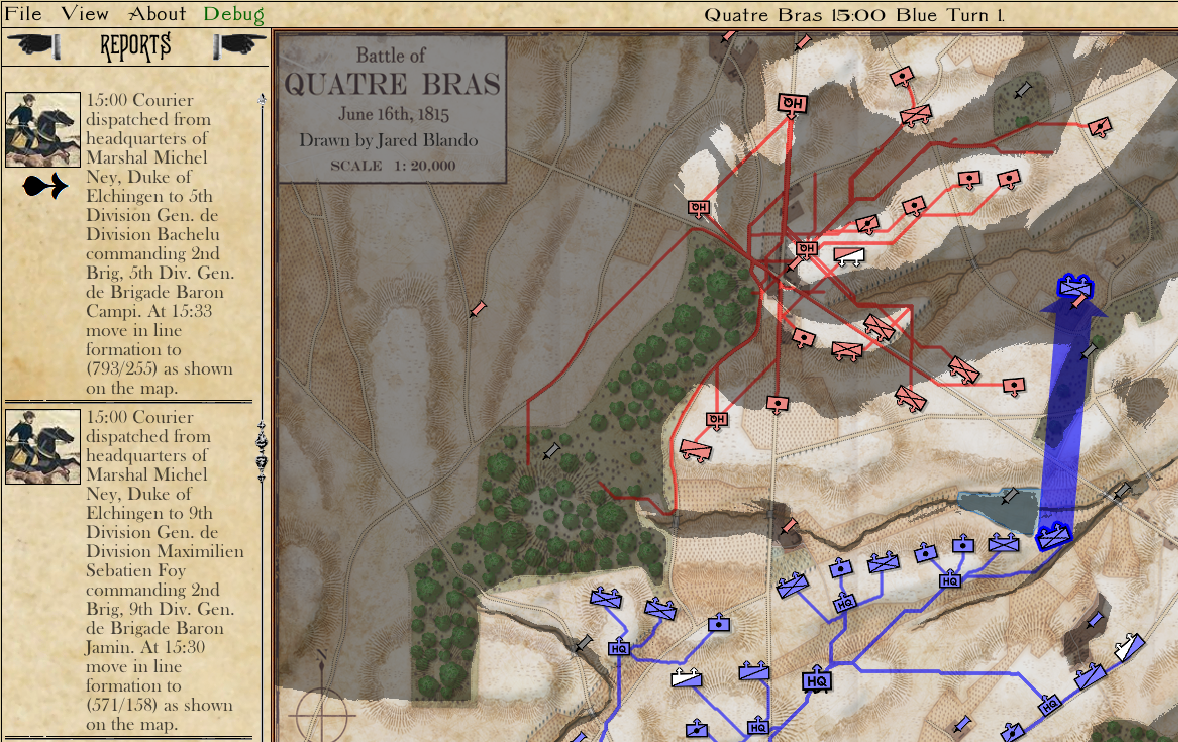
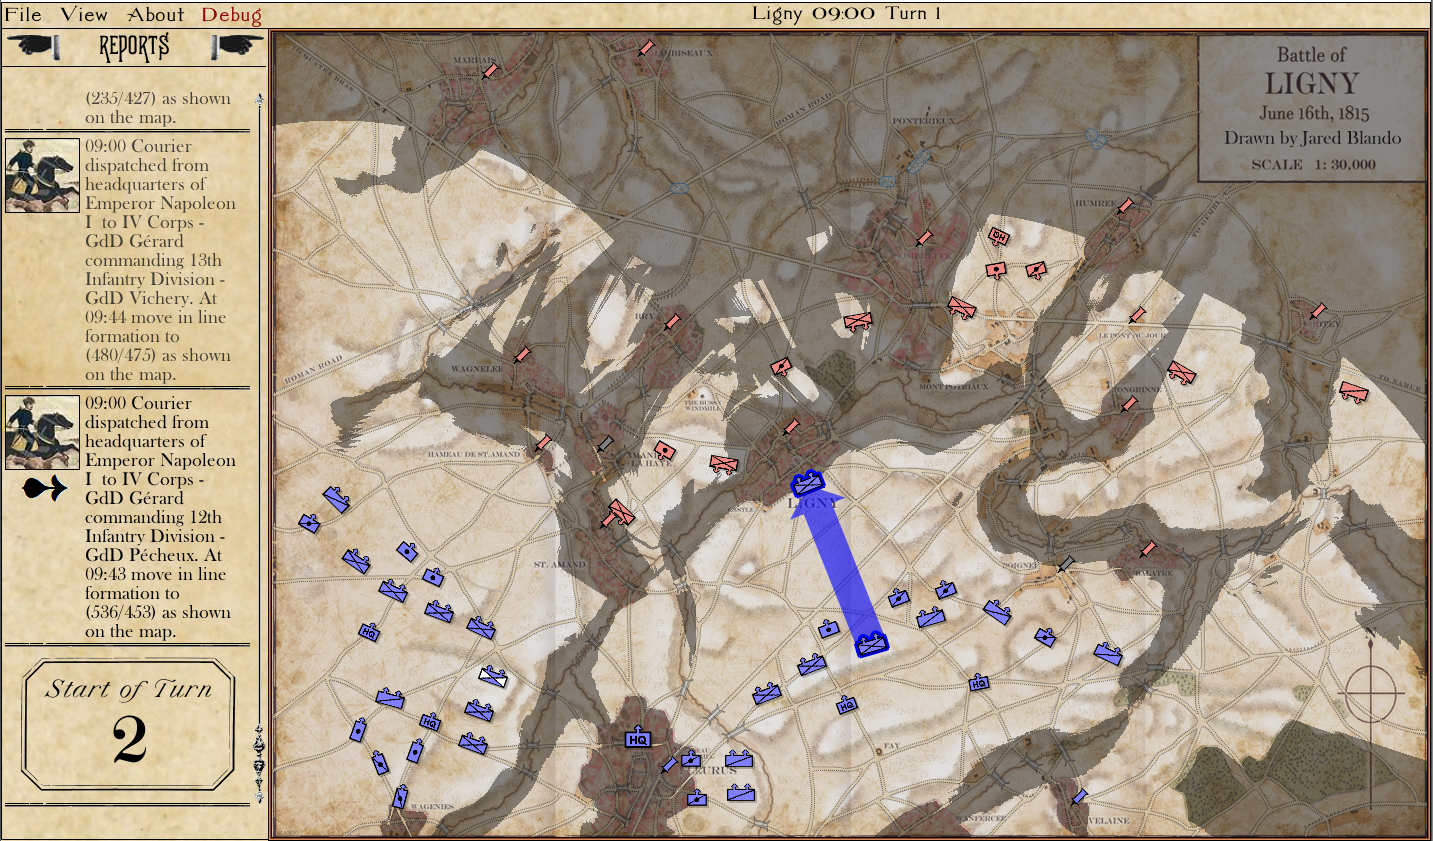
In this example, it would take 33 minutes for the orders from Marshall Ney to travel to General Bacheleu and then be transmitted to the individual unit (2nd Brigade). General Staff: Black Powder screen capture. Click to enlarge.
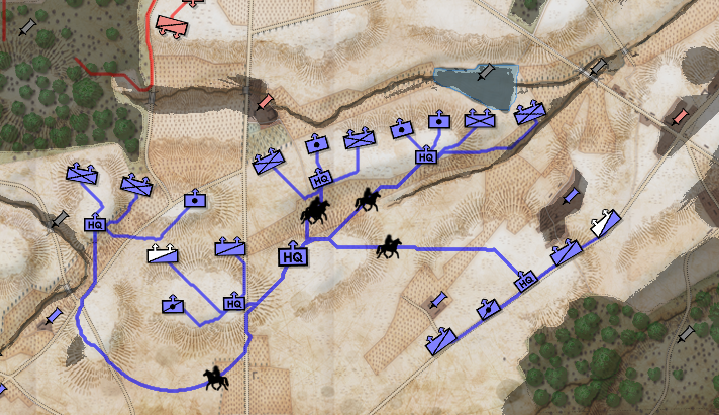
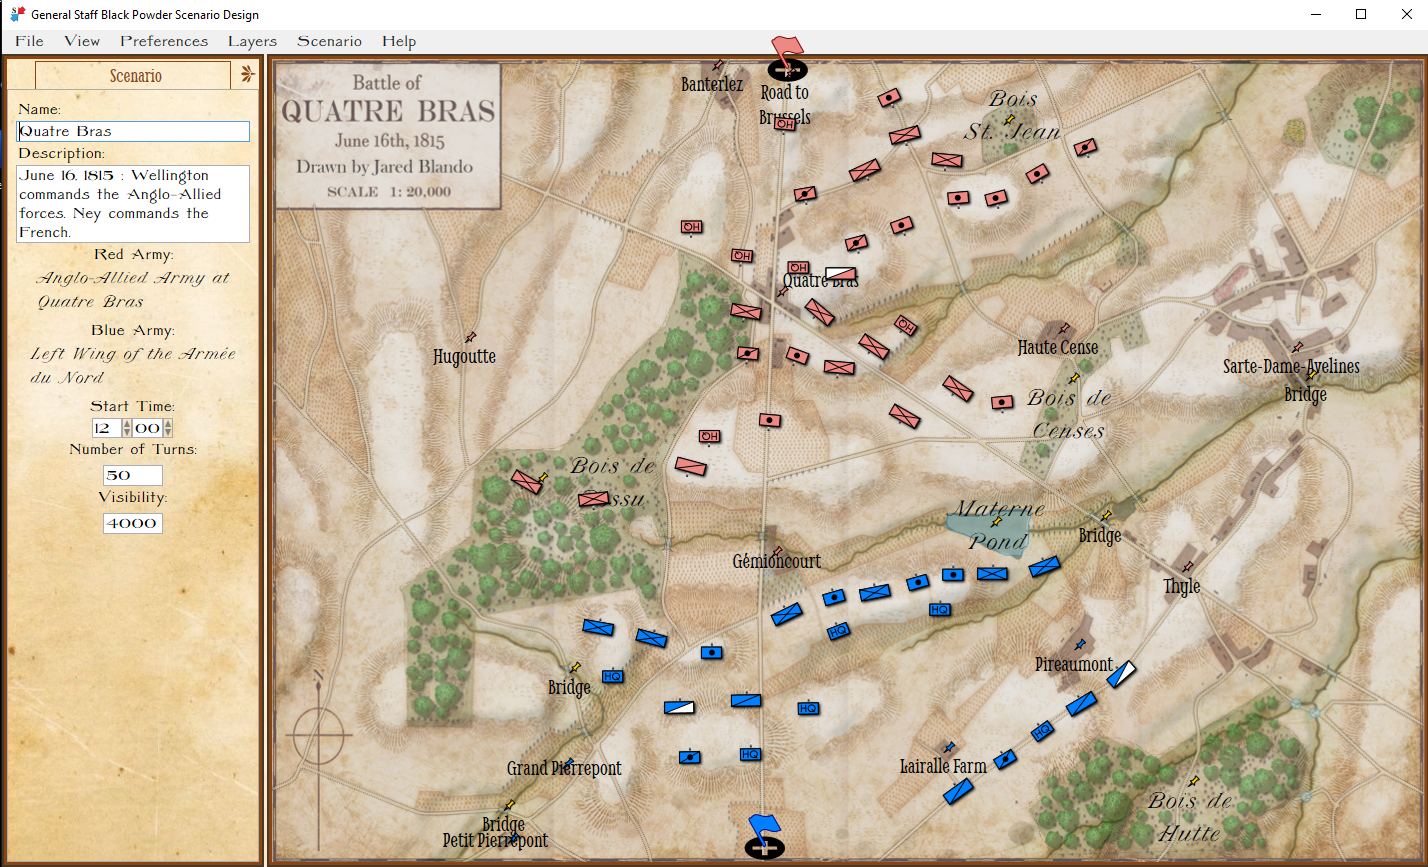
Here you can see the individual couriers traveling to deliver their orders from Marshall Ney to the subordinate commanders at Quatre Bras. General Staff: Black Powder screen capture.
Nineteenth century commanders issued orders that were delivered by courier to their subordinate commanders who, in turn, would send couriers and orders to their subordinate units.
Horace Porter, who served on U. S. Grant’s staff during 1864-5, provides a first person account of how a 19th century commander felt after issuing orders and then watching the couriers race off to deliver them.
“[Grant] said,… “The only time I ever feel impatient is when I give an order for an important movement of troops in the presence of the enemy, and am waiting for them to reach their destination. Then the minutes seem like hours.” – Horace Porter, Campaigning with Grant
When we released General Staff: Black Powder into Steam PvP beta-test, all orders were delayed by the time it would take for the couriers to deliver them. And all the beta-testers absolutely hated it! After giving orders… nothing happened on the screen. Depending on the scenario, it could be ten or fifteen turns before units began moving on the map.
Okay, I got the message! We’ve now added this option when you start a new scenario:
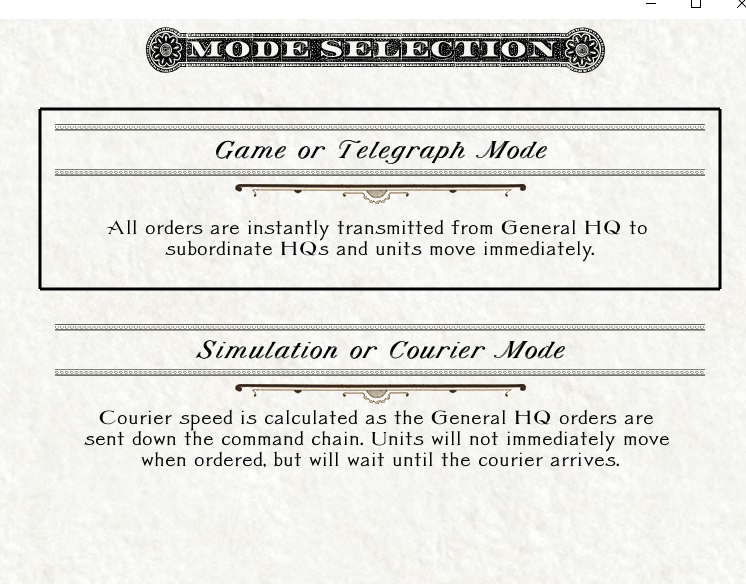
Select either “Game” (no order delays) or “Simulation” (courier travel time is calculated) mode when starting a scenario. General Staff screen capture.
We will next be introducing about a dozen new scenarios for out beta-testers to playtest.
Thank you for your considerable patience as we work to deliver the game that you want. As always, please feel free to contact me directly with questions or comments.