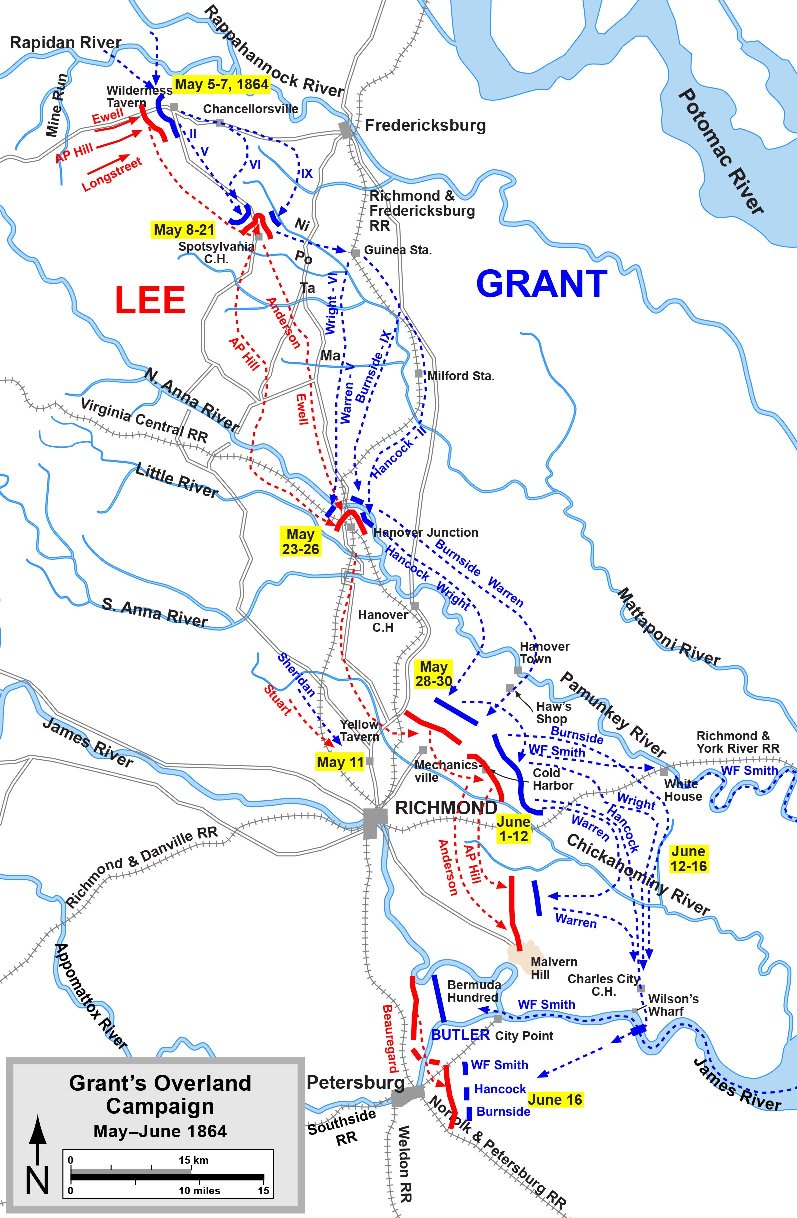
Grant’s Overland campaign that began at the Wilderness and ended at Petersburg. It can be argued that Grant did not win one battle but, clearly, achieved a great strategic victory. This was the beginning of the end for Lee’s Army of Northern Virginia and the beginning of the end of the American Civil War. Map by Hal Jespersen (www.posix.com/CW), found on Wikipedia. Click to enlarge.
I had just sat down to write this blog when a derecho,1)Ironically, the first person to use the Spanish word “derecho” to describe this type of storm was Gustavus D. Hinrichs, a German immigrant who settled in my hometown of Davenport in 1861. with wind speeds that peaked at 117 mph, flattened much of Iowa and dropped a hundred year old maple tree on my ’98 mustang. We also lost power and internet for a week. I spent much of that time reading old favorites including Horace Porter’s Campaigning with Grant. Porter, who served on Grant’s staff during 1864-5, provides a first person account of many extraordinary events from the start of the Overland Campaign to Lee’s surrender at Appomattox. Admittedly, the 19th century prose does get a bit flowery at times, but the he was actually there when it happened aspect of this memoir makes it invaluable.
I was struck by this passage from the beginning of the campaign and how it felt like what I wanted to write about to explain where we are on completing General Staff:
“[Grant] said,… “The only time I ever feel impatient is when I give an order for an important movement of troops in the presence of the enemy, and am waiting for them to reach their destination. Then the minutes seem like hours.” – Campaigning with Grant
At this point Grant was now General in Chief, commander of all U. S. armies including the Army of the Potomac. Orders had been issued and every U. S. army was to be on the march at this very moment and there was nothing more that Grant could do. Grant was confident that his plan would ultimately be successful. If we look at the map of the Overland campaign (above) we see that Grant wanted to fight Lee in the open. If that was not possible he would move by his left and Lee would have to respond. Eventually, Lee would be forced to entrench around Richmond and Petersburg and Grant would trap him. It was like a chess master looking sixteen plies ahead: there was nothing Lee could do, his defeat was inevitable.
There are two programmers coding General Staff: Andy O’Neill is working on the actual game from my design documents and me (I’m working on AI). Andy specializes in Microsoft Windows Presentation Foundation (WPF) development of business applications. General Staff is a wargaming system that utilizes multiple interlocking programs (like Microsoft Office) so it is logical to use Microsoft WPF for development. Andy is literally a Microsoft gold medal developer. Andy also specializes in the Model-View-View Model (MVVM) development technique. This is a method commonly used in Microsoft business applications. Despite repeated efforts to learn MVVM I confess that I am just an old coder, set in my ways, and I can’t get it. While Andy and I both write in the C# programming language, it’s best if I do not muck about with Andy’s code. What I do is write AI routines in C# and Andy imports them into his code.
In early July or late June Andy, who lives and works in Liverpool, England, fell very ill with an undefined infection. He became very dizzy and nauseous and was unable to write any code for over a month. Andy reports that he is now, “sort of…nearly…better.”
And this is why I felt like Grant on May 2, 1865: there wasn’t anything I can do to move the game forward. I’m working on the AI Engine and researching battles, maps and OOBs but that’s it. And then we lost power and the internet for a week.
My wife says that when I can’t work I get, “very testy.” Grant, however, outwardly was imperturbed. This is how Porter describes him this day:
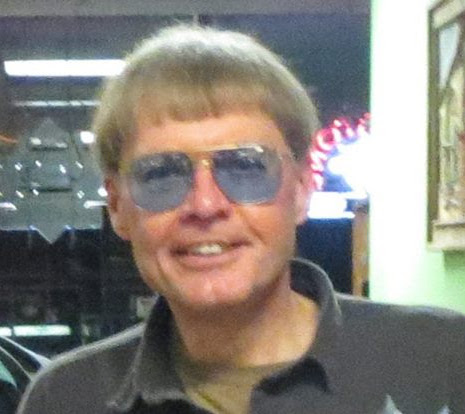
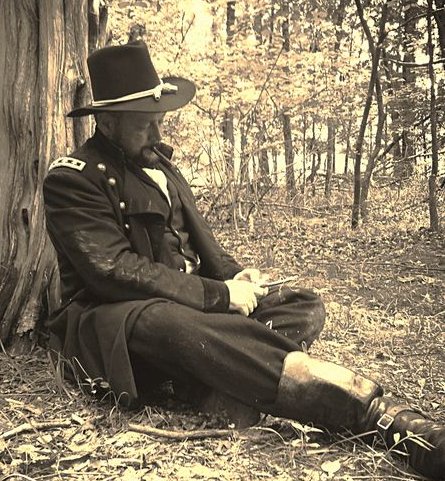
General Grant Whittling Again – Civil War Reenactor Kenneth Serfass portraying Lt. General Ulysses S. Grant whittling at the site of Grant’s headquarters knoll at the Battle of the Wilderness. 150th Anniversary of the Battle of the Wilderness, 1864-2014
“… most of the day he sat upon the stump of a tree, or on the ground, with his back leaning against a tree. The thread gloves2)It is assumed that Mrs. Grant gave him the gloves. Grant wore them out whittling and never wore them again. remained on his hands, a lighted cigar was in his mouth almost constantly, and his penknife was kept in active use whittling sticks. He would pick up one small twig after another, and sometimes holding the small end away from him would rapidly shave it down to a point, at other times he would turn the point toward him and work on it as if sharpening a lead-pencil, then he would girdle it, cut it in two, throw it away, and begin on another.” – Campaigning with Grant
So, in summation, almost nothing has been done in the last six weeks to move development of the actual game (what we call the Game Engine application) forward. For this I can only sincerely apologize and repeat what you know: there’s only two of us coding it and when the lead coder falls ill everything stops.
What’s Going on with the Scenario Editor?
There are three stand alone programs that create data files used by the General Staff Game Engine: The Army Editor, the Map Editor and the Scenario Editor. The first two have long been available to early backers. What’s holding up the release of the Scenario Editor?
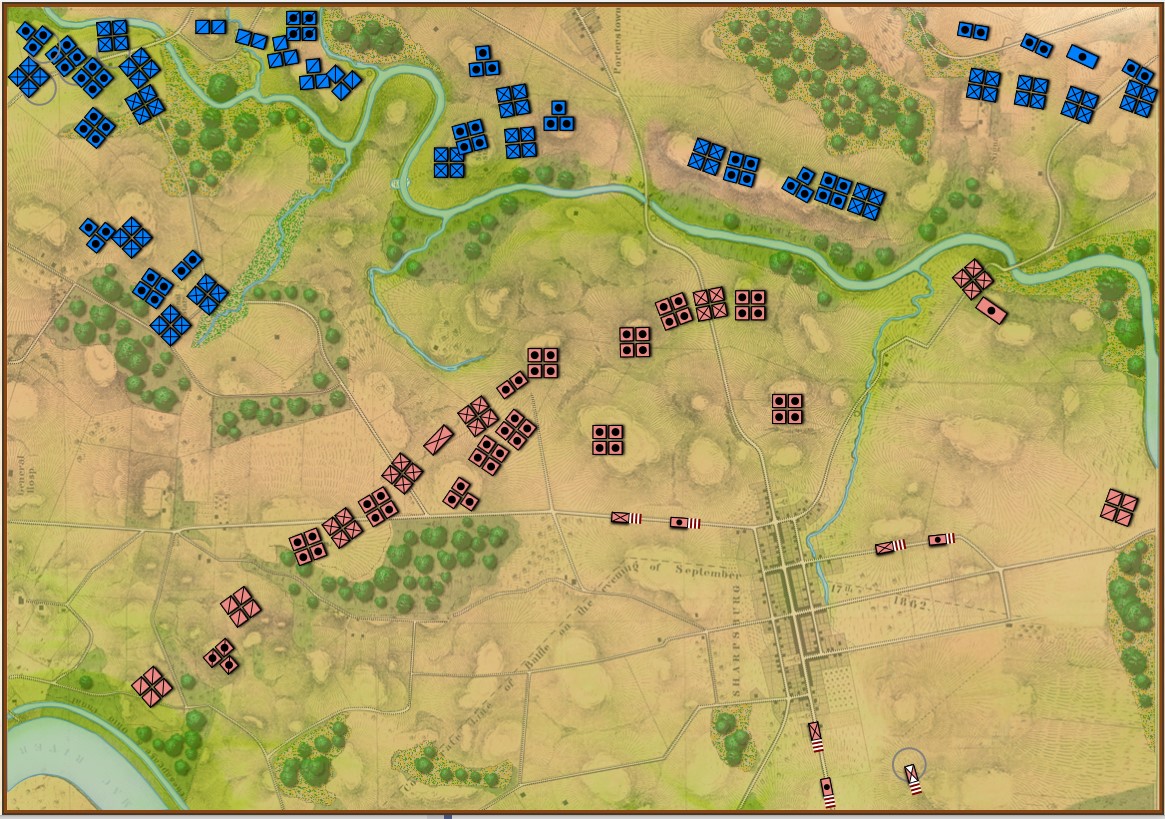
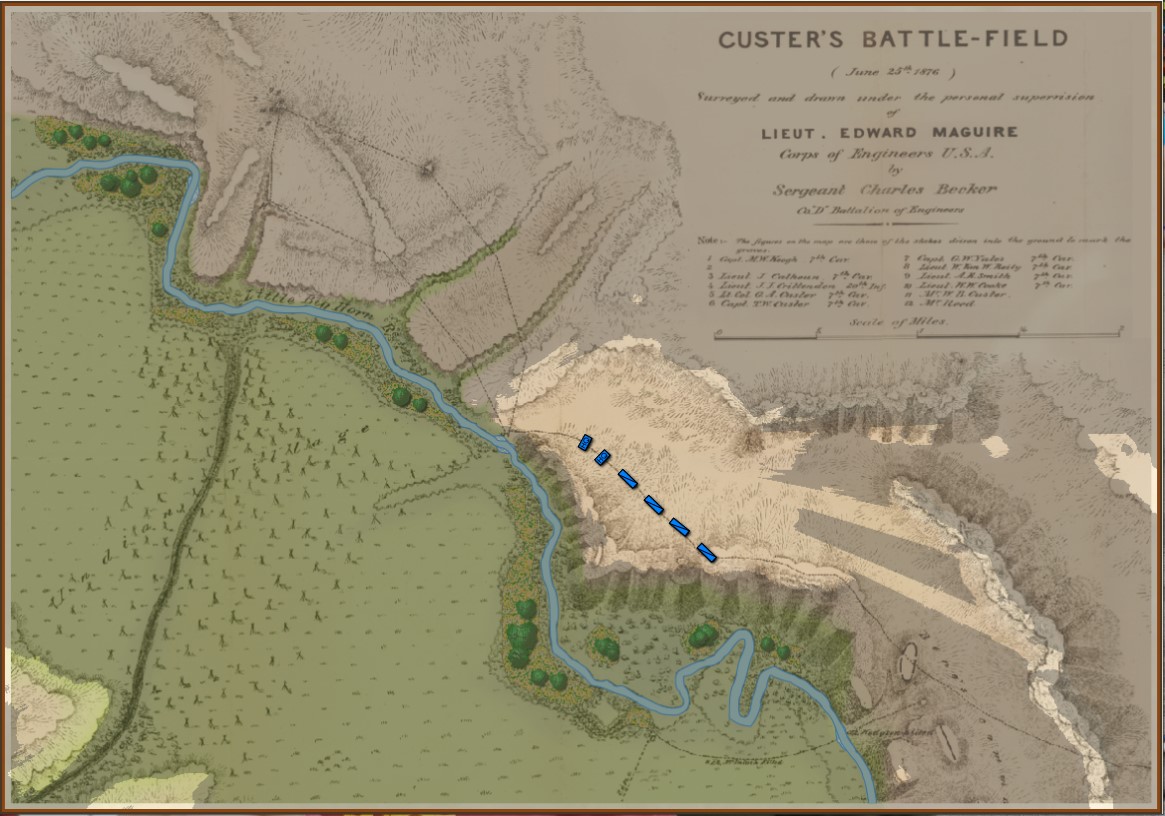
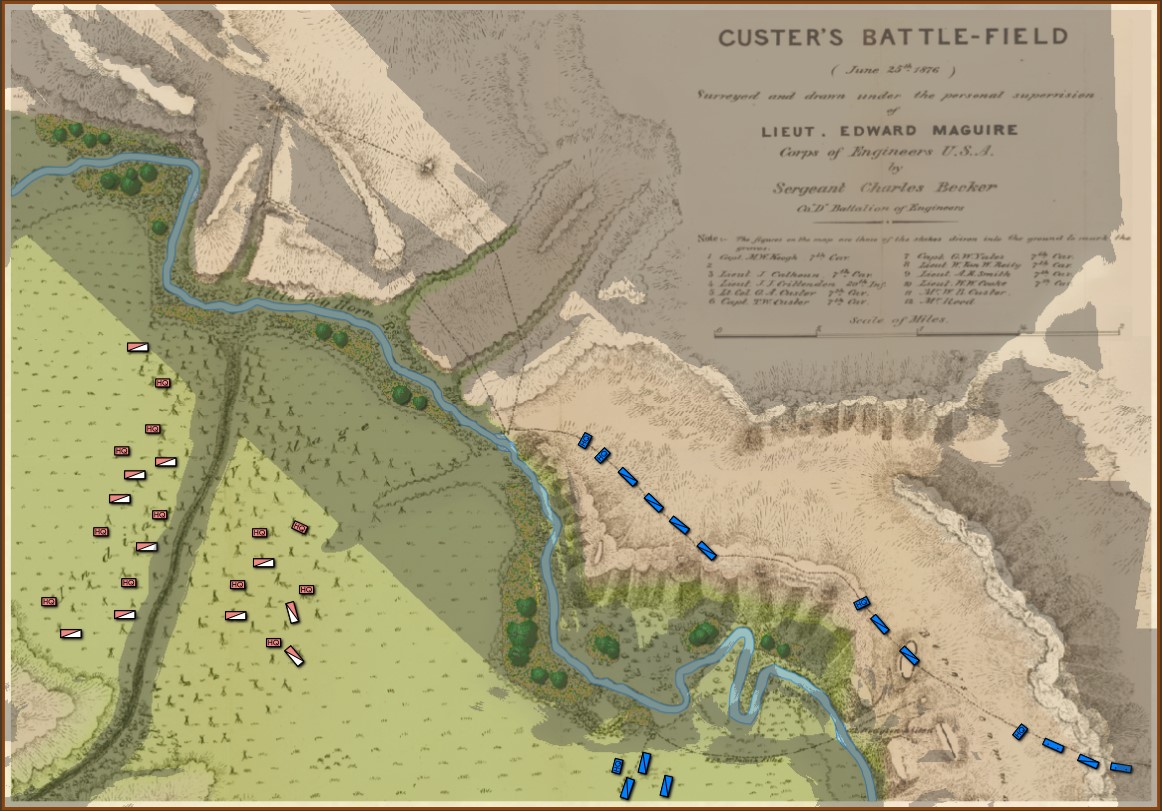
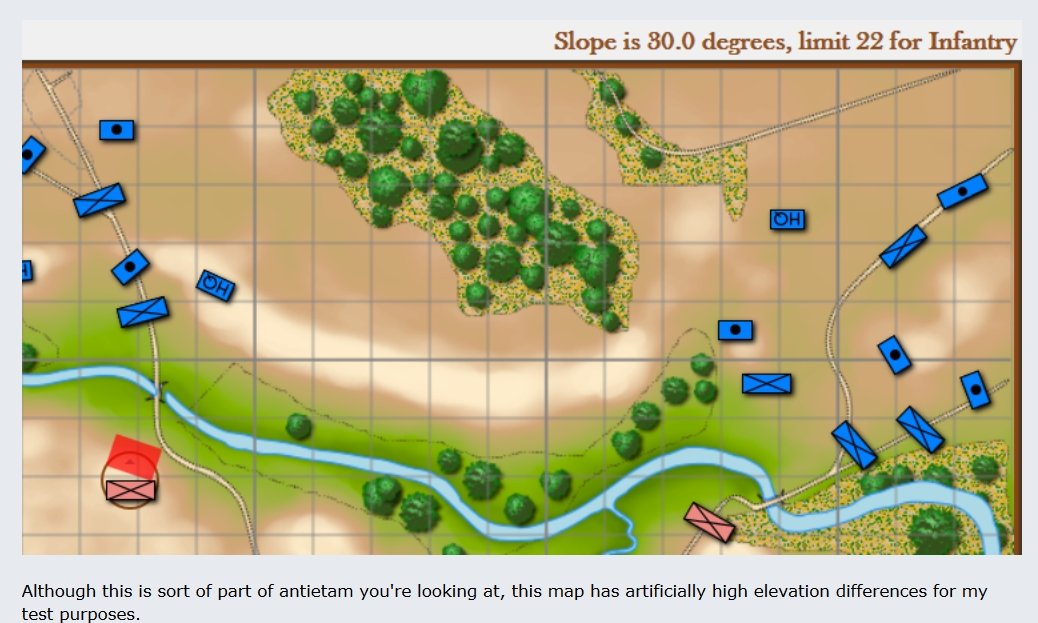
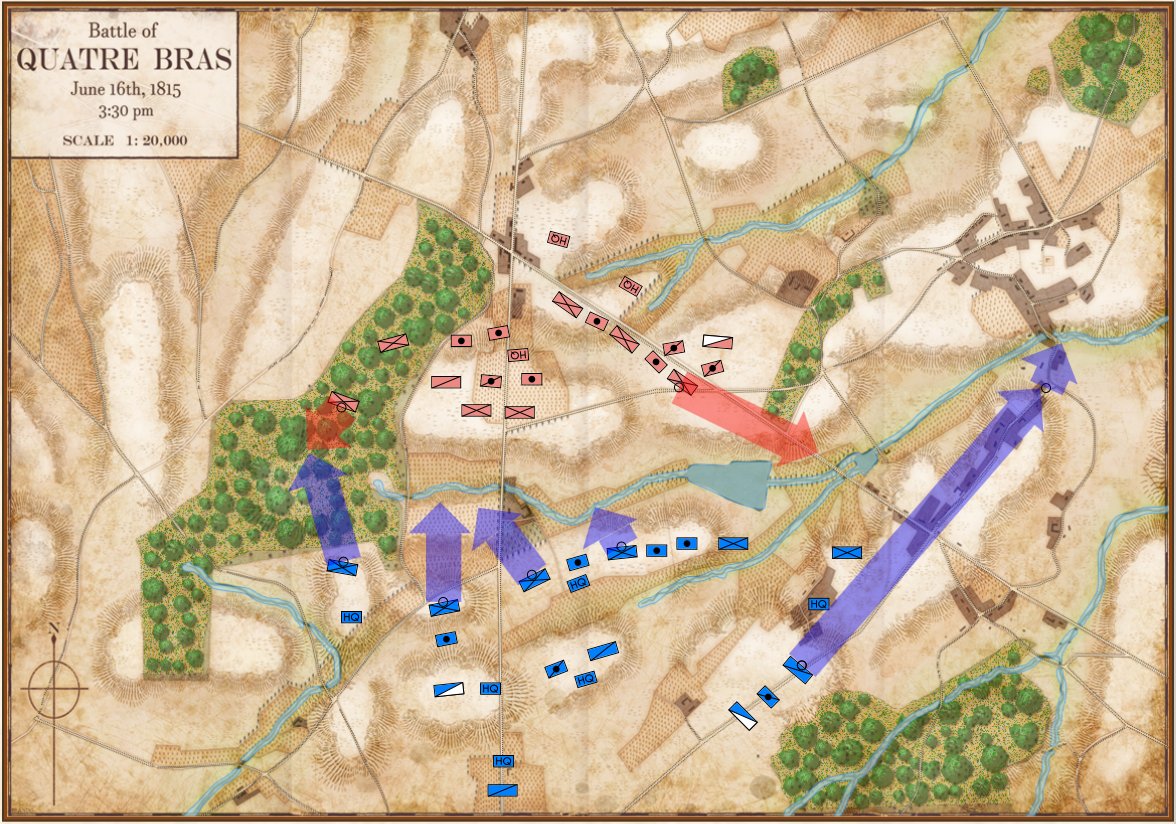
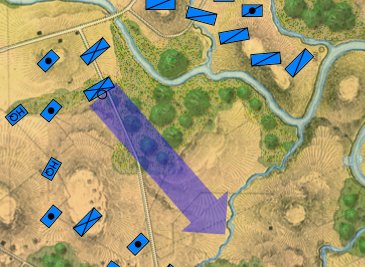
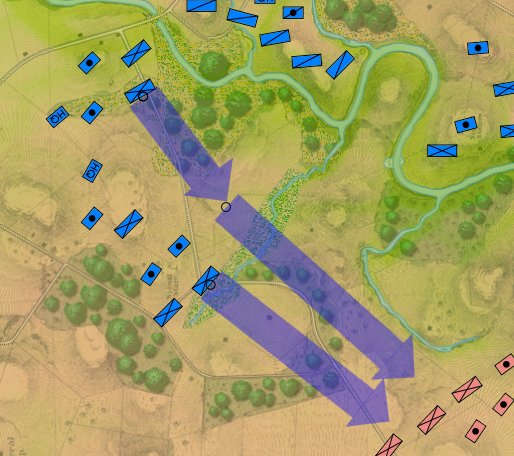
The Scenario Editor is actually done, and has been completed for some time. I use it to create the scenarios that you’ve seen and that I use to test the AI:
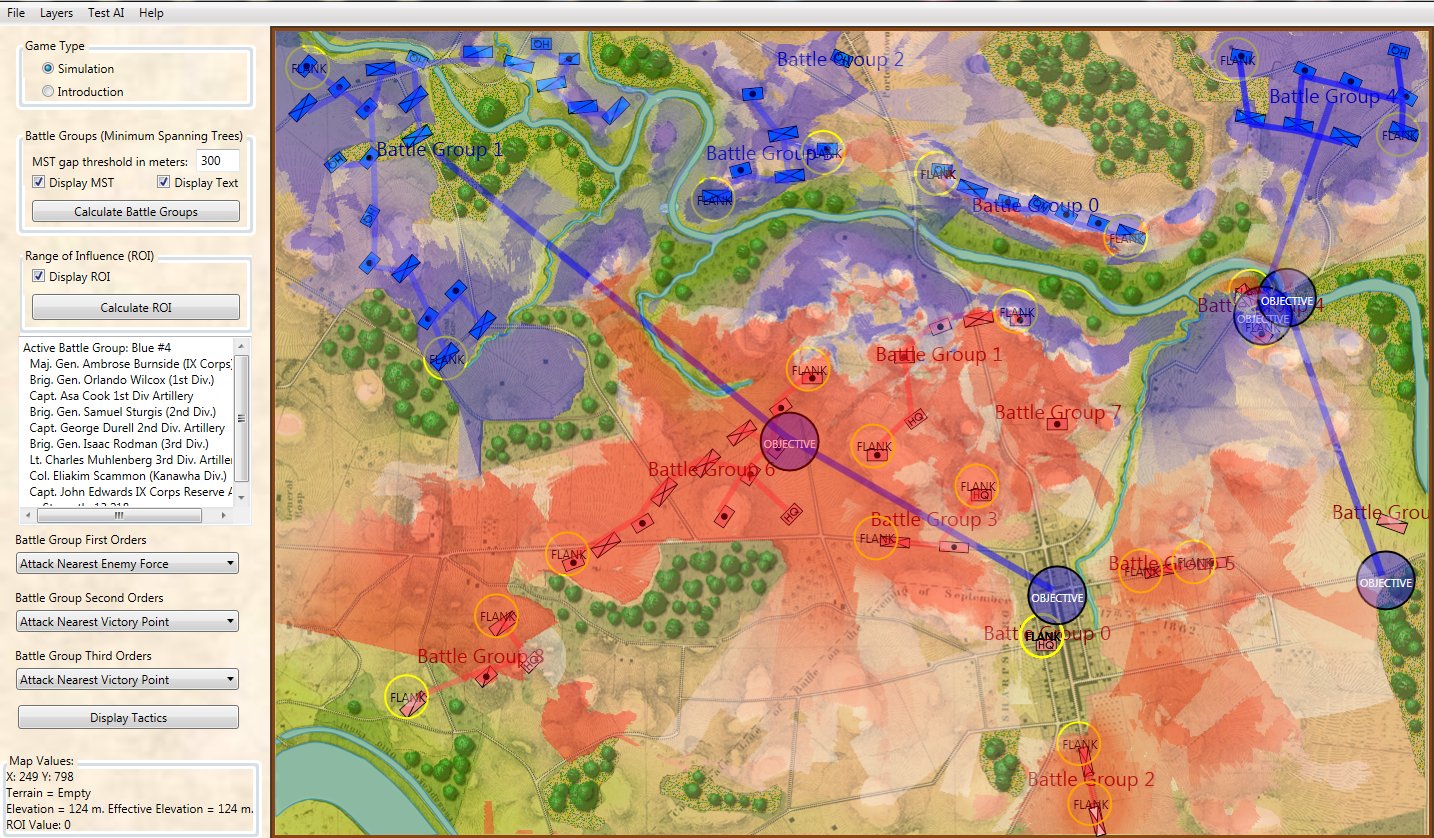
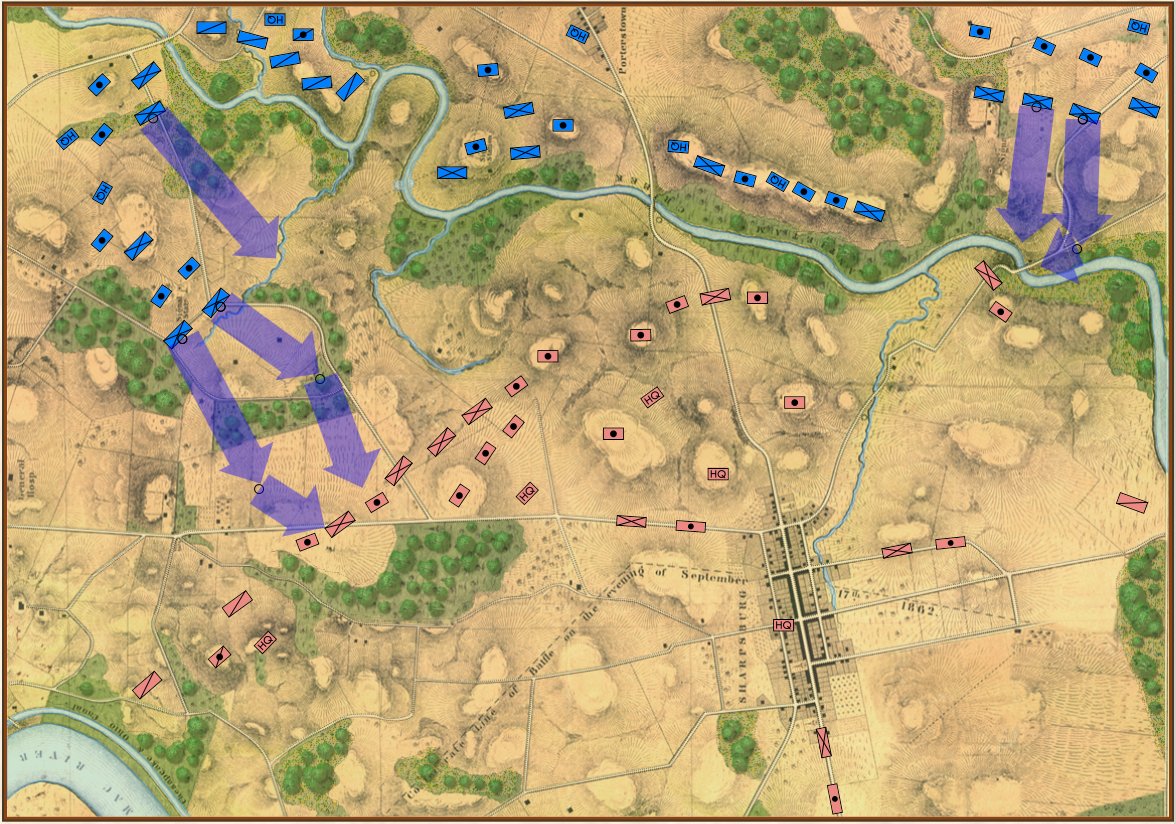
Screen shot of Antietam with battle groups, range of influence and objectives displayed. Click to enlarge.
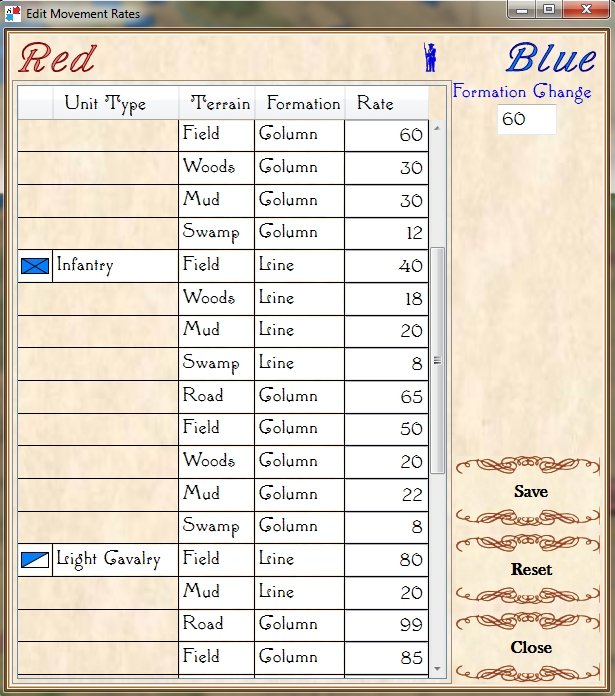
So, why haven’t we released it? Because as we (that is to say, Andy) works on the Game Engine we discover that we need to make changes in the data files. For example, I left out the time it takes for a unit to change formations. To correct this, we need to add that value to the scenario data files and that, in turn, means a change to the Scenario Editor, itself. And, even worse, it means that previously created scenario files are no longer compatible and have to be redone. Andy, specifically, said he didn’t want to make the Scenario Editor available to early backers for this very reason: you could lose your earlier work.
So, in conclusion, again please allow me to apologize for these delays. There will inevitably be more delays before General Staff is completed. But, like Grant at the beginning of the Overland campaign, I am supremely confident in our inevitable success. Grant famously said at this time, “I propose to fight it out on this line if it takes all summer.” It actually took all summer, fall, winter and next spring before Lee surrendered. But the ultimate success of the campaign was never in doubt.
And, as always, please feel free to email me directly at Ezra [at] RiverviewAI.com.
References
| ↑1 | Ironically, the first person to use the Spanish word “derecho” to describe this type of storm was Gustavus D. Hinrichs, a German immigrant who settled in my hometown of Davenport in 1861. |
|---|---|
| ↑2 | It is assumed that Mrs. Grant gave him the gloves. Grant wore them out whittling and never wore them again. |